

 see more of the crumley's paper trains or download the pdf here.
see more of the crumley's paper trains or download the pdf here.
see more of the crumley's paper trains or download the pdf here.
 Anyone who knows me can tell you that I am very particular about the photos I post on my blog. So, it pains me to see the "before" photos of my friend's bachelor pad posted before I have any "after" photos to share. But everyone has been asking for them so I thought I might as well go for it since I have updates to the project to tell you about.
 The audio/visual wall is also due for an update and will be getting a snazzy new console to hide all the stereo/tv ephemera. The business meeting notes taped to the wall will be getting a very professional looking easel and will be relegated to the "office" area. The kitchen is behind the television wall and boy is it lovely.
 You're lucky I didn't post the photo the showed the hideous florescent light fixture. The institutional yellow is bad enough but then there are those weird curved "wall splashes" (I don't know what else to call them) on each side wall that are killing me. My original plan was to paint the kitchen dark brown a la Ron Marvin, and install mercury glass back splashes but since it's a rental, I didn't want to tear those things off and create a bigger mess. So now the kitchen will be painted Benjamin Moore Dove Wing and I pray that it makes those things less noticeable. We're also taking off the "swinging door" which is completely useless since it runs into the stove which juts out too far. Gotta love it.
 This is the view to the front door with the other kitchen door open and one of the two entry closet doors visible. There are a lot of doors in this place with not so nice trim so I am planning to just paint the entire entry including the trim and doors Benjamin Moore Middlebury Brown so they hopefully all blend in and disappear. I am also going to take page out of my friend Maison21's rule book and install a dimmer on the entry light. You can never underestimate the power of mood lighting.
 This cheap monstrosity of a book case will be one piece of furniture that will not be staying. In it's place will be a large console table topped with a pair of lamps and a mirror to reflect the light from the wall of windows in the living room. I also would like to flank it with a pair of chairs but we'll have to see how far the budget takes us. I practically had to pry the credit card out of my friend's hand today in order to buy the paint so I don't think I'm going to be getting any more money for this job. Oh, did I mention I'm not even getting paid? We'll discuss that later. Moving on...
 Are we in a fishing lodge or a New York apartment? Hard to tell huh? All of that is going, needless to say. It's too bad my friend doesn't have a country house. We could relocate everything to it and kill two birds with one stone. I might have to work with the dining table but the pale blue ladder back chairs will be replaced with something more modern. Not sure what yet. The unfortunate light will also be replaced.
 As I mentioned earlier, the blinds are actually nice so they are staying. One less thing for me to worry about! Funny there is a bike in the dining room considering all the empty closet space. That and the fact that I can't actually see my friend riding it!
 The bedroom isn't that bad actually. We're keeping the wood sleigh bed but replacing the mattress. I've also picked out two vintage bedside tables with drawers. It's hard to tell from this photo but there is a lot of floor space so I'd love to add a pair of chairs by the window and move the brass Cedric Hartman looking reading lamps next to them. I also found a great double dresser with leather handles from Ralph Lauren that I would love to add to the wall across from the foot of the bed but it's $7,000 price tag is a little steep for our budget.
 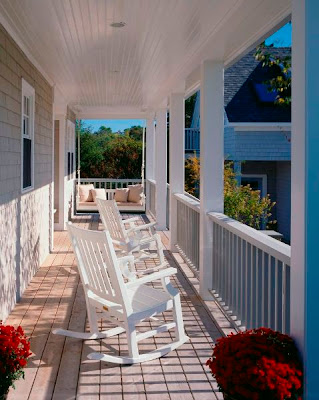 We arrive on to a lovely porch. Perfect to relax with a book and listen to the crashing waves.

 Notice the fantastic ceiling and porthole window. But, the pièce de résistance' is the starfish railing. What a wonderful custom feature that adds a tremendous amount of personality to this fabulous room. I love the cut outs of marine life and especially the lighthouse post. Notice how the beadboard is brought back into the design scheme, with the lower cabinet doors. The cabinets are a perfect shade of blue, which done incorrectly could have overwhelmed the space. But, this shade of blue actually adds to the ocean and beach feel in subtle but beautiful way. The lighting also reinforces that this is a place for sun and sand! Pull a stool and grab an apple!

Once you have your tools, it just takes measuring to see what length you want your squares. Use your miter box to cut the ends of the molding at 45 degree angles. That way, they match up in the corners to create a box. Make sure the wood is level before nailing in, and then go for it. I like to paint my projects white when everything is installed. It gives it a nice, crisp look. This is what I did to the island in my last post, but with black paint obviously.
Here's another example:
Once you do it one time, you'll be a pro!! The best part -- it's CHEAP. The molding is typically comes in 8 foot sections and these run anywhere from $3 to $10 a piece. So you can transform your room, stairway or hall with around $25 to $100, depending on the project.

 but it's the matching glassware that completes the joke. using tape, stick a cross on the svalka glass. spray paint the entire glass with frosted glass spray
 . please note that it is for decorative purposes only as the spray is not safe for food. what a waste! i can so imagine swirling my rocks in one of these.
 see more of eviedee's emergency booze cabinet.

And here is the after:
 The best part -- this was a $30 project:


