
Well before this blog was a twinkle in my eye, I was making headboards instead of buying them. DIY headboards are nothing new and I’m sure you’ve seen a ton around blogland. They are all over the “land” because they are one of the easiest and cheapest updates you can make to a bedroom – with very little time and moola you can have a custom piece for your room.
Mine are pretty basic – no cutting of wood! (I don’t count what the guys at the hardware store do for me!) The headboard for the Bub’s room is slightly different than what I did in the past:

The one above is the simplest I’ve done – just a piece of plywood cut to size, covered with batting and then fabric. That’s it! I didn’t completely staple the fabric all the way around, and just screwed the board into studs on the wall, then secured the fabric with a staple gun around the edges (while it was on the wall).
To cover the staples I used pretty trim and hot glue. Easy peasy squeeeeezays! I did the same process in our bedroom before we got our four poster bed. (I know I have a picture somewhere – I’ll try to dig it up.)
Anyhoo…normally you use foam in the process – but I had never used it because of the cost. If you haven’t noticed – foam is wicked expensive. It’s a petroleum-based product, so it fluctuates with the cost of gas – which anymore is wicked expensive. :)
So a couple years ago I found this headboard project over at Kara’s place and her idea stuck with me – use an egg crate mattress topper instead of foam! It’s only about $10 for a twin size, $15 for a full size.
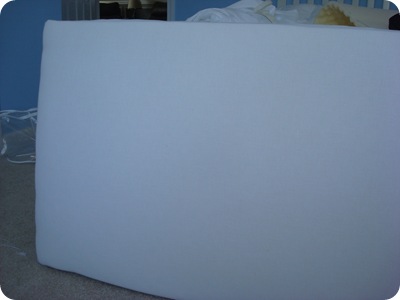
For the Bub’s headboard, I got the full size, and I ended up using two pieces to make it extra cushy:
 Just lay your plywood (that you had cut at the hardware store) on top, trace it out and cut it. The bonus about this egg crate stuff is it’s SO much easier to cut than regular foam. I used spray adhesive to adhere it to the plywood. (When I say “adhere” – I mean stick just enough till I can wrap fabric around it.)
I didn’t even use plywood for this headboard – I used the board that the baby mattress laid on from the Bub’s crib. I kept thinking I could do something fab with it – and I did. Score!:
 Usually I use batting for the next step, but the piece I had wasn’t big enough, and I didn’t want to spend any extra cash. So I just used extra muslin from my stash. (I’m a poet and I didn’t even know it!) This stuff is as little as $1.99 a yard -- way cheaper than batting. You could also use an old sheet – basically any thin fabric.
I stapled and stapled aaaaaaand stapled:

And had a nicely wrapped headboard, waiting for the beautiful blue fabric:
I did the same with the blue fabric, then installed little hangy thingamabobs to hang it:

You can see the corners are a bit of a mess from the back – as long as the sides are presentable, who cares? Not me!
The result was a beautiful, soft headboard for under $30 (for fabric and egg crate foam):
 This is the fabric I used for the drapes in this room, and I ADORE it.
 I had all kinds of ideas to add a little somethin’ to this headboard – I was going to tuft it with buttons, but when I got it up I realized you wouldn’t even see them when the bed was made because of the pillows. Even though we never make beds in this house, I still didn’t think it needed tufting. ;)
Then I was going to add molding around the edges, but I when I held it up, it just was too much – and I have enough molding going on in the room as it is.
I was going to add nail head trim around the sides, but Joann’s was flat out of it today (argh!) and now I’m thinking that may look a little skimpy along the side…I’m not sure.
For now, I absolutely love it as is! It’s sooooo soft and smooshy!
This whole headboard project took less than two hours to complete – I started it when Father of the Bride 2 began, and finished well before mother and daughter had their babies. (I cried. Like I always do. Even though it’s insanely cheesy – I love those movies!)
I’ll show you the whole big boy bed soon – I think I’m going to post about what I’m doing under that chair rail next. Those of you who follow me on Twitter have heard me talk about it, and if I don’t explain it soon, I think a few of you may just hunt me down. ;)
Check out my latest advertiser!

P.S. Something about this post is making the spam comments go mad -- so I'm turning on word verification for a bit -- bear with me!


