Well sheesh!! This project about kicked my booty! If you’ve been with me over the past few weeks, you know I’m redoing our kitchen with some help from American Express. (Wheee!)
One of the biggest projects was getting rid of our previous shiny black tile backsplash and replacing it with something lighter and brighter. It was a long process -- but I keep reminding myself that it was a WHOLE heckuva lot easier than taking down all the tile, and then doing this over it.
You may remember that I decided to just go right over the black tile with the beadboard paneling – brilliant if I do say so! But it did add some new challenges that I wouldn’t have had to deal with otherwise.
My friend Traci and her hubby recommended this PL glue instead of Liquid Nails for gluing over the tile:
And it worked great! I found it at Home Depot no problem. Be careful with it though -- I got some on my arm and didn’t wipe it off right away, and it actually burned my skin over the next day or so. I had wounds people!
All for the love of beadboard!!
Otherwise, it was super easy to work with. Other than the wounds. :)
Normally I would just glue and nail my beadboard into the wall, but with the tile behind it, it wasn’t possible. The great thing about glue is you have a few minutes to get things just right, which is helpful when working around your eleventy billion outlets and light switches:

Does that make sense? Most of them were just cut out of the sides of the beadboard piece – only one was cut out of the middle of a panel. Do do that, you’ll need to drill holes with a drill bit to get a start for your jigsaw, then cut out the hole for the switch/outlet.
These DO NOT have to be perfect – this is a very good thing! You’ll want the electrical outlet to sit on the beadboard. Not like I have pictured above (I hadn’t glued that one down yet). When you put the outlet cover back on, it will cover all sins! :)
To get your outlet to come out from the wall a bit to match up with the beadboard, you may need some spacers:
These go behind the outlet and make them come out a bit more, so they are flush with the beadboard. This is important because the beadboard is about 1/4 inch thick and without these, the outlets and switches wouldn’t match up with their covers.
Does that make sense? :)
There are a few tricky areas I had to work with – one was the window sill:
I still need to caulk these – and this side I may actually slip a little piece of beadboard in so there’s not such a gap. The other side looks a lot better. :)
For this spot, I was going to use a handy dandy tile tool that molds into areas like this, then you can trace it and jigsaw it out. But I forgot to buy it on my 859th trip to Home Depot, and I wasn’t going back that day (again).
So I took a piece of paper and traced around the edge of the window sill. It was very crude and not exact, but I cut it out, traced it on the board, and it WORKED! :)
There was one area above the sink (of course one spot that is SO noticeable!) that kept bulging and would not stick to the tile where the beadboard met up. It was driving me mad!!
I made the mistake of trying to nail into it, and it just wasn’t happening with the tile behind it. :) I ended up leaning barbells against it overnight to make it stay put! (At least they got used for something!!) Hee.
Anyhoo, that area looks like butt:
I may try sanding it down with the heavy duty sander and painting over it again. Or I may just ignore it because no one else will ever notice it. I like the ignoring idea. :)
For some of the edges, I just came up with ways to trim it out on the fly:
This one was a piece of craft wood from Michael's, and a dowel rod on the corner. I’ve told you before how I use dowel rods with beadboard – they are a PERFECT for inside and outside corners and edges you’re not sure what to do with. They look like the bead in beadboard:
And the bonus? They are less than a buck each. Score!
I have a little bit of an obsession with corbels – LURVE them. So when I saw them in Layla’s kitchen and then used in a kitchen I loved in a magazine, I was hooked!:
The installation of these was a bit tricky with the tile behind the beadboard. To start, I took a one inch piece of wood and glued it to the underside of the cabinets, then installed the corbels under those:
It brought them down a bit, so you can actually see them:
I didn’t install them under the edge of the cabinets because of an outlet that was in the way on one wall. Most of them are about two inches in from the edge of the cabinets, except for the one above. They don’t all match exactly placement-wise, but if anyone notices it when they come to my house, I’ll give them a cookie for being so observant.
First I’ll shoot them the stink eye, then I’ll give them a cookie. :)
I found finishing nails that were just slightly longer than the thinnest part of the corbel, drilled a hole into the corbel, then nailed it into the wall. If I had used a longer nail, it wouldn’t have gone through the tile behind the beadboard.
Does that make sense??
I used liquid nails on the corbel and then nailed it into the piece of wood under the cabinet too. They aren’t going anywhere.
Actually – this whole backsplash is indestructible. I told hubby that we better like this for a long, LONG while, cause it’s going to take professionals to get it down. :)
I extended the beadboard past where the tile originally went to add some interest. Here’s a before:

Ignore that black switch plate cover. (I had to replace all of the black outlets and switches with white ones.) The new white one wasn’t big enough and I wasn’t going back to Home Depot. Again.
I found the unfinished edges of the beadboard, (no matter how straight they were), drove me batty. So I had to finish them off with trim to cover up any imperfections, and I’m so glad I did!:
I think it makes it look finished off and even more custom – and you know I can’t resist woodwork of any kind. :)
Sooo…the painting. Um, annoying. I used primed mdf beadboard panels (these were twice the thickness of the single panels – about seven inches wide). The primed beadboard does help tremendously!
A few of you Squeezes mentioned painting them before installation and normally I completely agree. But this time I’m glad I didn’t – the installation process got a bit messy. :) Between the glue and the dust it would have needed a whole new paint job anyway. And the jigsaw put a ton of marks all over the pieces I cut, so there’s no easy way to get the painting done – but the primed boards helps fo sho:

Here’s a bit of a before and after…ignore my obnoxious arrows in the before shots:
And check out the light and bright after!:
I had planned all this time to use a cream color on the backsplash, to pull in the color from the counters. I did a few feet of it, stepped back, and HATED IT. It looked too much like the wall color and looked dirty. NOT the light and bright I was after.
So I went with the semi gloss Behr primer and paint that I used in the Bub’s room and it worked GREAT. I figured I’d have to poly over it all to make sure it would hold up well, but as far as I can tell, I’m not going to need to. The semi gloss makes it completely wipeable.
It has completely transformed our kitchen! Before:
After:
Before:
After:
I want to break out in Stevie Wonder song – Isn’t she lovely?! :)
Now I have to make a couple more decisions – I’m wondering if I should add the beadboard to the side of the appliance garage:
But then the front would stick stick out like a sore thumb and may look odd not white – so I’m thinking I may just paint the whole thing white? (I think painting beadboard is annoying – that door will be a BLAST.) Hmmmm…I dunno. I have to sit on it for a while.
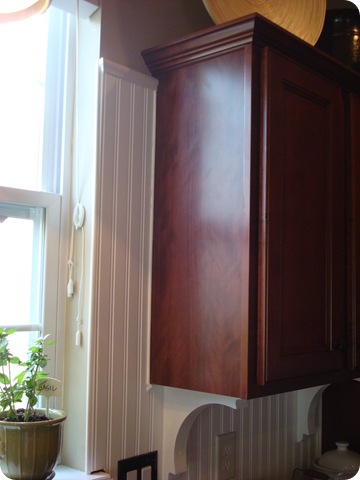
And at first I was going to beadboard the sides of the cabs by the window, but now I think that may look wonky:
I detest that cheap laminate stuff on the side of the cabinets! But I wonder if it would look weird to wrap it around.
Thoughts?
Overall, yes, this was work. If you are starting with a drywall backsplash – it will be SO much easier for you! If you don’t have a window to deal with – YEAH for you! Even easier! And if you don’t have outlets or light switches on your backsplash – you’ll have it made!!
No window or light switches probably means you have a very, very dark kitchen, but at least your backsplash will be easy!
Priorities people.
OH my goodness – I still have SO MUCH left to do in here! But I am thrilled with how it’s coming along! I LOVE IT!
If my instructions didn’t make sense or if you have questions, let me know and I’ll address them in a later post. And I’m SO excited at your reaction to the Show Me Off idea – keep the emails coming! If you have sent one in, be patient with me. :) I’ll get back to you soon!
Thanks to this week’s sponsor!:
P.S. Wow. The spammers love beadboard I guess. I had to turn on word verification for this one.


