Showing posts with label bathrooms. Show all posts

Creating a Luxury Bath Experience

I'm excited to be a part of a wonderful panel discussion this coming Friday entitled Creating a Luxury Bath Experience: The Best Resources and Tools sponsored by Waterworks and The Editor at Large. The panel which also includes Barbara Sallick of Waterworks and Matthew White of White Webb will be moderated by Samantha Nestor, the author of The Luxury Bathroom. Matthew will also be signing copies of his new book, Italy of My Dreams, after the discussion. I hope you can join us!

Creating a Luxury Bath Experience
Breakfast Reception & Panel Discussion
Friday, June 18, 2010
9:30 - 11:30am
Waterworks Showroom
215 East 58th Street
New York, NY 10022
rsvp to 646-460-8914 or waterworks@hlgrp.com


Table runner wall art.

OK, well I kinda lied about the not mentioning molding for another month thing. It wasn't deliberate, I swear. This project just kind of came to me today and molding was the perfect touch to finish it off. Sorry. Not really. :)

So I was feeling the itch for a Goodwill trip today -- it's been about a week, and after that long, I start daydreaming about it, and getting hives at the thought of something totally fab and perfect and lovely that's there waiting for me rightthisminuteandI'mgoingtomissit!!

Whew. So I needed to go. I found a few goodies for under $10 -- the other items I'll show you soon. This one, I just couldn't pass up. It was a table runner, all beady and natural looking. I feel in lurrrrve.

I stood there with it in my hands staring at it, not baring the thought of putting it down. But I couldn't figure out where in the heck I would need such an odd sized table runner. It's only 31 inches long.

So I thunk and I thunk and I thunk and it hit me -- I knew just where it was going.

Over the toilet.

Yeah, that's right. For the longest time, this is what I've had over the toilet (such an ugly word) in our little room in the master bath:
Don't ask. I have no clue what I was thinking. I was thinking spa I guess? It didn't turn out well. And towels over the toilet? Um....that's just not good. I mean, we didn't use them, but still...

So I had a vision, and it turned out exactly how I had hoped! First, I just nailed the runner to the wall using little finishing nails and my hammer:
I used my nail sinker thing (the technical term is totally escaping me) to get them in close enough to the wall so you couldn't see them:
Most of them I was able to just push in with my finger.

I didn't take pics of the molding process, because I think you've seen enough of that over the past couple of weeks. ;) But I added some thin molding I had in the garage around the runner to finish it off:I spray painted the molding before I hung it, but it still wasn't just the right tone. So I just brushed some of my walnut stain right over the top of the wood, and now it matches perfectly!
Because I love it so stinking much, I took a ton of pictures, so bare with me:
I'm not sure what you would call the style of our bathroom, it's a little traditional, a little fancy, a little nature-inspired. But this works, no matter what it is. :)

How gorgeous would this be in a dining room -- in a set of three on the wall hanging horizontally? FAB!
The before again:
The much lovelier after:
Total cost? Four bucks baby. And it took about 30 minutes start to finish, to complete. All during nap time, with time to spare to watch my stories. ;)

I know, by the way, what many of you are thinking. Why worry about this little wall in this little room that no one sees? Well, we see it numerous times a day, obviously. And ummmm....well....have you read this blog? Helloooooo, it's me. ;)

I will decorate anything if I can do it for cheap!

I can tile?

I pose that title as a question because the answer is questionable. The walls haven't come down yet, so I think I was successful. Maybe, YES, I can tile.

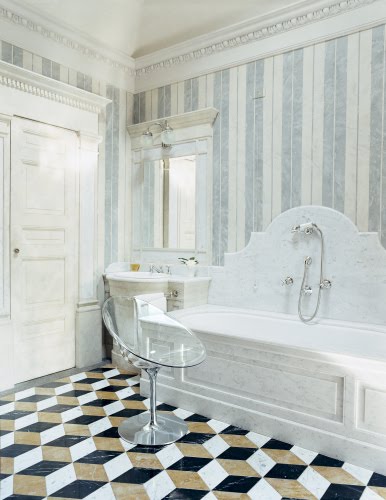
There are a few large projects in our home that I have avoided because of FEAR. Plain, good old, I-am-a-big-huge-sissy fear. One of them is the marble that surrounded our tub. It has bothered me for over a year now, since I added the molding to the walls around the tub here.

The marble is a creamy color and the walls are bright white. For normal people this would not be a big deal, but it made me twitch a bit, cause as you know, I'm not normal. I have been wanting to take off the marble surround and replace it with tile foreva.

So Saturday morning, I thought, what the heck, I'm going to go for it! What's the worst that could happen? Uh, believe me, the "worsts" were running through my head.

Sister helped me take off the marble -- I used razor and a pry bar, being careful not to dent the wall as I took off the marble:

This house was built very well, but we have found the one thing they skimped on -- all the tile in the house was glued down, instead of mortared. Makes an easier job for me, so I'm cool with it. Hubby was working downstairs and I didn't even mention this little project was going to happen -- he didn't know about it until he walked in and saw the mess. There was just a brief flash of complete panic on his lovely face, but God bless this man, it didn't last long. He has faith in me. :)

I didn't take pics of the installation part of this project, because I was working like a crazy mad woman to get it all done before my son woke up from his nap. You basically take the mortar and mix it like the directions say -- water and the mortar, mix it up -- that's it! Make sure to do this outside with a mask on.

The directions say to put the mortar on the surface and the back of the tile, but I did a couple with the backs covered and quickly found it didn't need it -- there was way too much and it was spilling through the tiles.

You know how on HGTV when they mortar, they just slap it on the walls and it goes on like butta? Yeah, it didn't work like that. I would swipe it on and it would pretty much just fall right off. It was fab. Next time I won't put quite as much water in as the instructions call for.

This is how it looked before the grout:

One thing I have learned about tiling is you can't judge it until you have grouted. Grouting just makes all the difference in the world:
To grout, you use the same mixer thing that attached to the drill and water or grout enhancer. I got the enhancer ($5) because it's supposed to help reduce the possibility of mold:
This part was much easier then the mortar:
My back was keeeeeeling me at this point, so I tried to sit for most of this part, but it didn't work out that way for long:
(See the Pepsi and popcorn? Sister was trying to give me energy food.) You'll notice I taped off the area around the tub with paper -- this was a life saver both during the mortar process and the grouting. It made for much easier clean up! The hardest part of this WHOLE process was wiping down the tile after grouting -- it felt like Groundhog's Day -- over and over and over. (And over.)
I still have some paint touch ups to do and some caulking, but for now, it is done:
I wouldn't have done it quite so tall, but some of the drywall tore of as we took off the marble, so I had to go a bit higher than expected:
I love how it ties the creamy of the marble tub, the white of the walls, and the green accent color all together! Yes, I am a happy crazy woman.

And yes, that's beadboard around the tub -- I just glued it right on the marble a while back. LOVE it! Here's the before before, from a couple years ago:
Here it is today. YAY!:
I'm going to do a little accent of this by our sinks to tie it all together, and I'll take pics of that process start to finish -- I won't be so sceered next time. Then, I want to rip out the shower surround and tile that whole thing, then the floors, then, then, then... Now, if I can just get those fixtures on the tub replaced, I'd be in heaven.

If you haven't seen my interview at houzz.com today, go here to check it out! Make sure to comment there for a chance to win the Ballard pear! (See previous post.) Your comments over there are making. my. year. by the way. I am so honored to inspire you. I can't thank you enough for your support.

The cutest little bench you ever did see.

I do love a garage sale, don't get me wrong. I do. But I find them hard to attend with a two-year-old. He loves to drive by them to look for "choo choos," but can't stand it when I try to run up a driveway real quick. Not a fan. He must see it all first hand.

So obviously, lately it's just not something I do much. Last week, I realized I love Thursday garage sales. First, it's the first day of the sale, and who goes to a sale on Thursday? Uh...no one. Score! Secondly, the Bub goes to daycare on that day, so Momma is free to jump in an out of the car to her heart's content. Double score!!

Last Thursday, I found this cutie little bench for five bucks:
I had been looking for something to fill a spot in our bathroom. It was perfect! (What I love most is it was made by the grandpa at the family garage sale. Hand made. Pitter pat.) At first, I was going to paint the bench out in white, and then cover the seat with foam and fabric. But the more I looked at it, the more I liked it just as it was.

Psych!! Push-sha! Like I could leave well enough alone, seriously. No really, I realized I didn't want to change it up as much as planned. I liked how simple it was and didn't want to mess with that. Then I knew what I wanted to do. I roughed it up a bit more by using a flathead screwdriver and a hammer:

I sanded the whole thing down, then used my walnut stain to deepen it up. Stain is extremely easy to work with -- a foam brush and a rag is all you need. Brush it on, wipe off the excess:
I finished it off with some tung oil and L.O.V.E.D it:
But it still needed something. I got more of my shower curtain fabric and made a little cushion:
I wanted it to look spa-like, but all the sudden it looked Asian spa-like. Nothing against it, it's not our room. So I made some tweaks:Just moving it to the side helped a ton! Then I added some tufting by sewing two buttons on. It was almost there...
I took a wire basket from above the kitchen cabinets and filled it with rolled up towels that were on the tub surround:
Ahhhh...yes! Only fifteen steps later, I got it there! Love it!!!


You think I can sew a cushion? Whateva:
Hot glue baby. Who's gonna know? Uh...don't answer that.
Total price: $5 for the bench, $3 for the fabric and less than a buck for both buttons. (The foam was leftover from another project.)
Awww yeah...

U.G.L.Y. (DIY shower curtain)

It ain't got no alibi. Our shower is UGLY.

Yeah! Yeah! It's ugly!

The shower is the ONE item in our house I couldn't get our builders to budge on. The shower doors are CRAZY low. It's nuts! We both have to bend down to get out of the shower, or we'll bonk our heads. The builder swore up and down they couldn't get a taller shower door. Huh.

Anyhoo, until we completely tile the whole bathroom, including the shower, (which will be most likely in my dreams only), I had to figure out a solution to hide this nasty thing:


I know, I didn't even match the towels or hang them up nice for ya'll. Just keepin' it real. :)
For a while I considered making a shower curtain and couldn't decide if it would work well. Then, one day Shannon posted hers and it was exactly what I was thinking!! I knew I had to do it.

I used simple white terrycloth instead of decorative fabric, so I won't stress if it gets wet. I found some grosgrain ribbon that matched the room and used my hemming tape to make a large rectangle, just to add some detail:
A cheapy almond colored shower rod was transformed with oil rubbed bronze spray paint. I used drapery rings from Lowe's to hang the curtain:
It will be open 99 percent of the time -- I think the only time we'll close it is when we have company over. But I love it open and closed!
The only problem -- one thing leads to another and now I need white rugs. Argh!! Isn't that always the way?

I'm having another Linky party ladies -- show everyone your Goodwill/thrift store/garage sale transformations! Fun, eh? I'll link it up on Monday, May 4th, so you have plenty of time to find that perfect item and make it caaaute!

Also, if you've tried anything I've posted about, I'd love to see it! I love when you e-mail me and show me what you've done! I'm going to do a post and share all of your projects, so if you have something you want to share that I inspired you to do, please e-mail me!

Tour of the pot-tay.

I thought a break from our regularly scheduled programming (that would be Christmas craft hysteria) would be good. I realized the other day I never posted final pictures of my powder room redo.

You can see the before there -- I definitely needed a change. Chocolate brown was the answer, and of course...molding. (Obsessed, I tell ya!!) I added the crown, the chair rail and the squares. The chair rail is not the right height, but I had to put it at the same height as my original chair rail. Which was my first stab at molding, four long years ago, so let's just say, it was not good.


I painted the ceiling brown as well, because I wanted the molding to POP. It worked. Love it. I put a coat of shimmer paint over the brown. Love it more.


These are raised off the wall. Can I tell you how much professional faux painters will charge you to do these? Let's just say a lot. I mean, fall off your seat, A LOT. I will do a tutorial to show you how easy they are soon...


I showed you this here:


But I need something over the toilet. Ugh, that word is just yuck. Toilet. Let's say potty. OK, not much better. Anyhoo, I found the shelf at Hobby Lobby, the rocks at Pier 1, and the candles at Target:


The candles needed something, so I found these rub ons at Micheal's and it added the little flair I wanted. But now I can never light these. Brilliant:


I use a flower pot as a trash can. Just the look I wanted and have you seen how much trash cans cost???


I changed out just about everything in this room:


The mirror was chipped and was a deal at Homegoods for $12. Painted it with my bronze paint, and tadaaaa:


Shhhh...this is where I keep the magazines. I know you have magazines in your bathroom!!! Don't lie!


I want to change out the faucet too...but I'm worrying that it's getting a little too bronzey/brown in there. I thought of adding pop of color somewhere but I also really like just the brown and white. I guess it will evolve like everything in our house!

Have you seen my blinkey and button for my upcoming events?? I LOVE THEM!! Aimee over here made for me -- she freakin' rocks. I have been talking to numerous places for weeks about making them and she did exactly what I wanted in a DAY. Love her. Go see her. And copy them into your blog if you want! Fun. I have some more shout outs to share tomorrow.


P.S. Oh, and I have attempted two of my millions of projects and they both failed miserably. I suck. I need to get my mojo back. A trip to Hobby Lobby is needed, STAT!

Check out this stream