Bachelor Pad Chapter 3: Painting Predicament

I hate choosing paint colors. I think it's the hardest part of design. I've had a lot of people email for paint color recommendations and I always tell them that paint looks different in every space and in different light and at different times of the day. It's really a crap shoot and on my bachelor pad gamble I did ok but I wasn't perfect.

The painters started yesterday and I could already tell that Horizon (OC-53) from Benjamin Moore was going to be too light in the bedroom. Then today I stopped by and realized that perhaps Collingwood (OC-28) might also be a little too light but Middlebury Brown (HC-68) in the entry looked amazing. The bathroom in White Ice (OC-58) looked fine, as did the kitchen in White Dove (OC-17).

It was decided that we had to go darker in the bedroom so I spent most of my Saturday at the Janovic Plaza/Benjamin Moore Paint store where I am on a first name basis with my helpful salesperson Shawn. I picked out three colors that I had made up in quart sizes to try on the wall and Smoke (2122-40) was declared the winner. It works very well with the other colors so there will be a nice flow through out the space. Luckily, the painter said he would repaint the bedroom for a reasonable rate so it didn't turn out too bad in the end.

The moral of my story is that everyone makes mistakes with paint. It's not the end of the world but mistakes do cost money so it's sometimes best to try the sample pots or have quart sizes made up first. This probably also means that people will stop asking me for paint advice which might not actually be a bad thing!

bjuron wall display

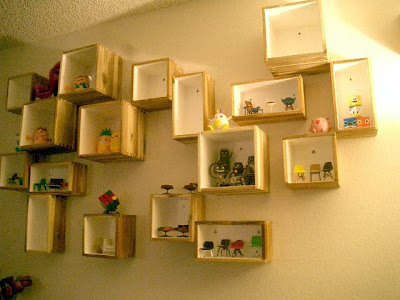
this ones from melissa, who previously gave us this bathroom remodel. now, it's a wall display with the bjuron plant pot.

she says, "one of my co-worker collects japanese toys and miniature chair models but unfortunately she lives in a small studio and doesn't have a lot of floor space for a display cabinet. her collection has grown so large that she needed a new way to display them and just sticking them on an ordinary shelf was out of the question for her. luckily i had an idea for her... bjuron planter boxes.

wall display boxeswall display boxesi suggested painting the inside white so that the toys would stand out well but leave the rest with the natural wood so there would be an interesting juxtaposition of the natural wood and man-made plastic toy. we selected planters of all sizes to increase the visual interest and to suit the display and size needs of different toys and collections. finally we screwed them into the wall and displayed her collections."

Favorite Things: Summer in the City Edition

Memorial Day always heralds the beginning of summer in the city even if the calendar still says spring. My office has already begun summer hours and the rising temperatures are necessitating a change of wardrobe and accessories so I thought it would be fun to share a few of my favorite things that help me get through summer in the city.

First up are dresses. The one above is from Vera Wang Lavender Label but any dress will do as long as it keeps you cool and comfortable. Just throw it on and run out the door and then smile smugly at all the men wilting in their suits. Looking good is the best revenge!

One minute you're sweating outside and the next you are freezing to death in an arctic office. My favorite solution is the summer weight cashmere cardigan from J. Crew. Pick a color, any color. Chances are they have it and the best part is that they are thin enough to stash in your bag when you go back outside.


I'm like a Magpie when it comes to shiny shoes and I have a special weakness for gold. They look great with tanned feet and Jack Rogers makes one of my favorite pairs. I consider them a classic and I love the fact that you can wear them every summer and not worry about them ever being out of fashion. They're definitely on the preppy side but I think the gold makes them a little more St. Tropez than Nantucket.


If you're going to wear a dress, you better make sure your legs are up to par. Everyone always asks me how my legs look so tan and I always admit my secret is Estee Lauder Go Bronze Tinted Self Tanner for the Body. The tint makes it easy to apply and the color looks very natural. But some people swear by Neutrogena and other Clarins so by all means figure out what works for you but just make sure you rub in and wash your hands. There is nothing worse than seeing badly applied self tanner streaks and orange palms.


We've already had one hazy, hot and humid day this week and my hair would have looked much worse were it not for Phytodefrisant. I love it so much that I buy the large economy size otherwise I'd look like Monica in Hawaii! There is nothing chic about frizzy hair.

I've already mentioned my summer perfume, Mimosa by Calypso, before but the deliciousness of this clean scent bears repeating. When everyone else is smelling not so fresh, you'll be smelling like you just stepped out of the shower. It's worth keeping a travel size in your bag for when you have to sit next to some Sweaty McPherson on the subway. You've been warned!

The very best part of summer for me is reading a lite book in the park or on the beach all day! I have a friend going through a divorce right now and she can attest that it's no party but the book, The Divorce Party, is getting great reviews. It's set in Montauk so even if you're stuck on the subway reading it, you can dream about being at the beach.

And if all else fails, you can always call in sick and go lay out in Central Park. Just make sure you wear sunscreen so you don't get caught!

Call Me!

I'm in need of some personal calling cards at a reasonable price. I have MOO cards with my blog information on them which I love but I think I also need something a bit more chic and professional looking. I really like the letterpress cards from Brooklyn Social Cards but they are $250 for 250 cards which is a bit more than I want to pay at the moment. Does anyone have any other suggestions? Thanks in advance!

Cover your windows!

OK, on my list of easiest, "thriftiest" ways to decorate your home...window treatments are WAY up there. Problem is, most of the somewhat affordable treatments that you can buy at stores are too short for homes with nine foot ceilings (that a lot of us have now). Even the regular 84" draperies are too short for eight foot ceilings because your drapes should at least hit the floor, if not "puddle" at least a bit. If your drapes are going to be operational, meaning you are going to close them for privacy or light control, you should go with a length that just hits the floor, or just a little bit of a break at the bottom.

Here is an example of just hitting the floor:


Here they are with just a little puddle, which I tend to favor:


Even though some places, like Pottery Barn, have lengths that will work, they don't carry a great selection as far as color or prints are concerned. Their treatments are beautiful, but a bit "vanilla." Not to mention, holy CRAP, they are expensive. So what do you do if you can't find the right length or design at the store?
MAKE YOUR OWN!! Stop laughing at me and listen. It really isn't hard! The best part about making your own window treatments is you can make them in just the right fabric that you LOVE.

All you need:
  1. Yardage of fabric that you need. For nine foot ceilings, you'll want about three yards of fabric for each side of the window. This gives you enough for hems.
  2. An iron. (See, I told you this was going to be easy!!)
  3. Hemming tape. You can find this stuff anywhere, even Target. I like the heavy duty type but even the regular will work for most fabrics. It looks like this:

    Get out the ironing board, and use your hemming tape to hem the fabric. Easy. as. pie.

If you are using a rod to hang the drapes, just fold over the top enough for the rod, and hem. If you aren't using a rod, you don't even need a rod pocket. Just hem the top and use the clips on the drapery rings to hang them.
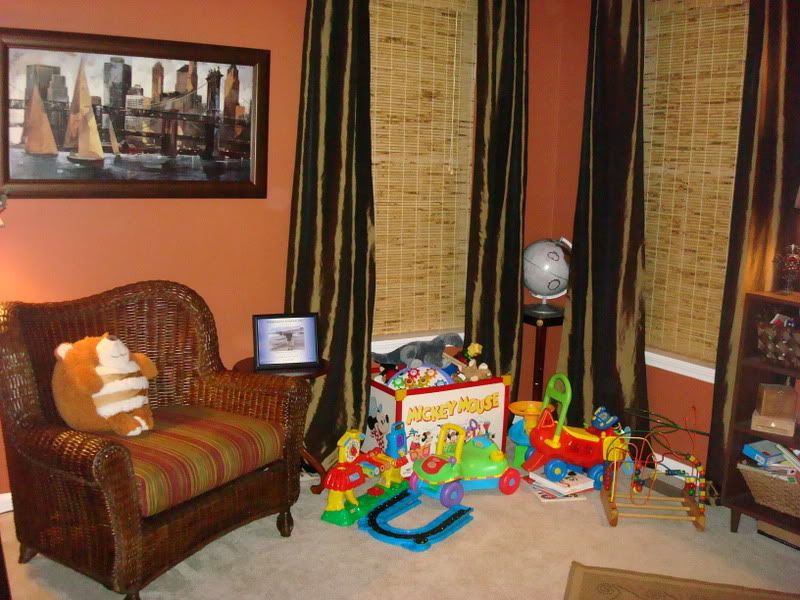
Here's an example of a set I did -- this was my first attempt at making my own (excuse the toys -- obviously the office is now the toy room!):
Photobucket
I even cut the width of the fabric in half, because I knew I wouldn't be closing them and didn't need enough to cover the whole window. So I made window treatments for two windows with only six yards of fabric. I had a coupon so I think I spent about $40 for the fabric. Hemming tape is about $3 for a package. Seriously...you can't get any better!!
Come on, you can do it!! :)

hackadditions: share your version

you have a version of a hack seen here? share it with us. it's great to see what others have done or how they have improved on stuff.

here are a few that i received recently. i've added them to the original posts. please click on the links and scroll all the way to the bottom to see the additions.

[apologies to my rss readers if you receive all the old posts (but with new additions) again. there is just no way to stop feedburner from resending them.]

curtis adds his wicker headboard


richy spruces up harry


eve pimps her frosta


two wall collages. this one's from allie.


and this from patti.


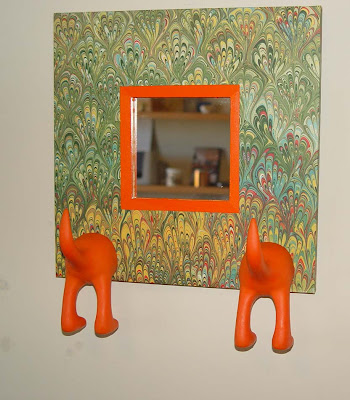
more can be done to your malma, as concha shows us.


and the perennial hacker favourite. the fira, now chromed.


Pretty in Pink

You never know what is going to come up at work and today was no exception. I spent most of the day in meetings regarding the design for a client's new lap pool at her home in Maine which meant quickly researching lap pool dimensions and cold climate pools. Part of my research led me to Martha Stewart's website since she has a home in Maine called Skylands. That's where I found the following photos from her guest cottage with an interior painting entirely in pink. I usually don't like pink but it's a pale dreamy color that works well as a backdrop to some lovely grey wicker furniture. Enjoy!


Photos from marthastewart.com

ikea celebrates summer

it's summer over at ikea and it's looking bright and breezy. click here to check out their summer collection.

since we're all in sunshine mode, thought i'll post some outdoor or garden hacks.

container garden table
pia hacked an old lack table into storage for gardening equipment and place for her plants.

she says, "it now hides our tumble drier and lots of gardening equipment. i removed the old legs, put on vika kaj and turned them so they became maximum height, which is 90 cm (approx 35"), then i used some fabric and some ironing glue, you can buy that at ikea as well. no sewing required, simply measure the places you want to hang the curtains, and iron the edges - you need to make an opening for the curtainholder to go through, and then attach the curtains to the table as shown in the photo."

bouquets of bloom
chelsea pairs an old farm window with ikea for a bit of country.

she says, "so, i have a bunch of old farm house windows (from a friend's family farm), and had yet to put them to use, but had lots of ideas fluttering through my head. today i finally used one of the windows. it was super simple. i used a kroken kitchen rail, and 3 kroken cutlery caddies.

i attached some eye hooks to the back of the window, and then chain to that (which i bought by the foot at my local home improvement store), and then attached the chain using S hooks into the soffit overhang. i still plan to stencil a little hummingbird, and some sort of quote (once i decide which one). it was really easy, only took me about 20 minutes, and cost only $16!"

spruce up the old
alessandro gave the wooden applaro chaise lounge a sunny new colour.

let there be light
dario from italy, with help from his neighbour, sandro, hacked some outdoor lighting for his graphic studio.

he says, "i live in italy close to venice and have a graphic studio in the countryside. together with our neighbor sandro we had to decide outdoor lighting styles of the studio. he came up a cool and cheap idea.

here is what you need:
- light bulb
- light socket
- ordning cutlery stand
- ikea plastic mug (actually they don't sell what we used anymore, but i believe kalas can be even better.. no handle!)
- bolt and screw
- transparent rubber pipe

just make an hole on the bottom of the mug, cut the handle and put it together.. that's it! the mug keeps the rain away from the wires and will give a touch of relaxing color to your house!

see more on dario's blog.

now for some summer fun
need some thing to hold toys around the pool? this one from rob is simple but totally workable.

rob says, "i cannot take credit for this hack. i got the idea from familyfun.com. they say to use a small white clear wastebasket, and i thought of the fniss clear wastepaper basket. it only took a couple of hours. the nice thing about the fniss is you don't need to use the marbles per the directions. it makes a nice umbrella stand, then in the summer use it around the pool for toys."

see more on rob's blog.

***
help change the world with an email
on another note, this is some thing we can all do to help make this world a better place. if you remember, colin beavan (who is also part of the liferemix network) of no impact man is meeting congressman jerrold nadler this friday to ask him to support an effective global warming mitigation policy that is based not on what is politically possible but on what is scientifically necessary.

his dream is to show nadler and speaker pelosi thousands of emails supporting his position. if you'd like to help, go to Colin's blog, copy the form email, and send it to noimpactman+nadler+pelosi@gmail.com. those of you who aren't American citizens, please put "From a world citizen to whom American policy makes a huge difference" in the subject, so that he can deliver them but keep them separate.

Inspiration Board

I have an invitation/inspiration board in my bedroom where I hang up invitations, post cards, and pretty pictures. I never really thought it could be a powerful tool until I read an interesting chapter in that book, The Secret. (I usually don't admit to reading any sort of self help books but my friend mentioned it and so I thought I would dig it out from under my bed where it was hiding and actually give it a shot. You know you have a copy hiding somewhere too.) So anyway, one of the suggestions in the book was to create a Vision Board, where you post "pictures of all the things you want, and pictures of how you want your life to be."

There was a very convincing story from a man who pulled his board out of storage five years later to find out he was living in the exact house he had posted. Creepy coincidence or divine intervention? Not really sure but I thought I might give it a try so I posted my dream Mercedes, some pretty shoes and my favorite house and garden. What do you think? I figure it can't hurt, but if it does work, I might have to take down the picture of Mick Jagger by Andy Warhol and pick a more age appropriate soul mate possibility.

Oh, speaking of soul mates, I do take offense at the Relationship chapter that essentially just preaches the Feng Shui principle that tells you to literally make room in your home for another person. There is definitely not room for two people in my apartment so I sure hope someone out there is making room for me! Otherwise, I may have to move!

another way to hang your stolmen

here's another way to skin the stolmen. instead of using the little fixtures to hold the shelves, this idea from pavel of israel works out pretty well too.

he used:
  • 3 laminated wood boards 1800 x 300 x 30 mm
  • 2 stock stolmen posts and 6 end fixtures
  • 12 screws 30 х 4 mm
  • 24 washers 3 x 15 mm
  • 24 washers 1 x 15 mm

stolmen shelvesstolmen shelves

More examples of my obsession

So now that I've explained how to add molding to your home, I thought I would share more ways I think it has transformed our house.

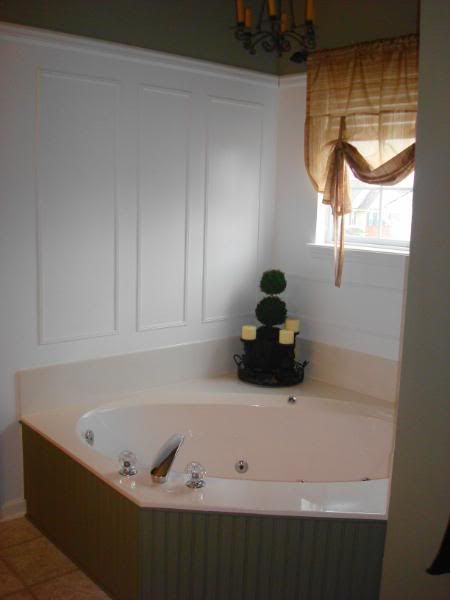
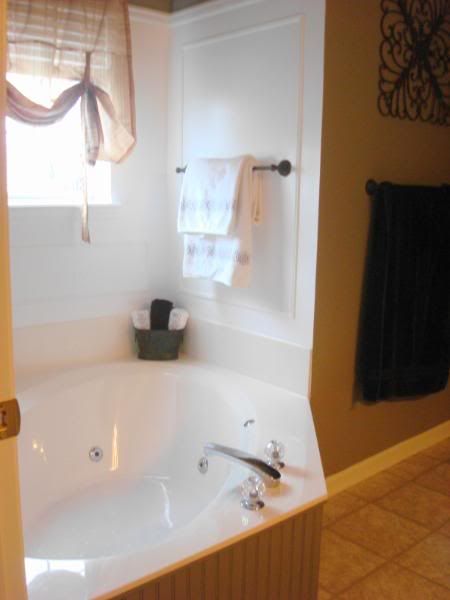
Our master bathroom is one of my favorite examples. We have extremely high ceilings that I painted with a mossy green color. After a while I realized how dark it was in there, but there was NO WAY I was repainting those walls again. I thought about adding tile around our tub, but figured it would be at least $1000 to do that. So I ended up using molding around the tub to lighten up the space.

Here is the before:

Photobucket


And here is it after, with the magic of molding! :)


Photobucket

Photobucket

I added rectangles to the walls around the tub with molding, a chair rail around the top and painted it all out white. Then I used beadboard around the marble base of the tub and painted it a shade darker than the walls.

The BEST PART! This whole project was $40! The molding is the only purchase I had to make -- the beadboard was leftover from another project and the paint I already had. You can't beat it! We'd still like to change out the tub fixtures, but that will be later -- for the plumber. :)

Check out this stream