fabulous nudie postage stamp lamp

one of the best things about running this site is that i get mail from some really nice people. zieak, whose cam creature i featured some time ago, sent me a precious list of hacks trawled from the amazing craftster site. saved me hours of searching. big hugs, zieak.

the first from the list is this fantastic nudie postage stamp lamp by martine. i just love it. naughty and nice at the same time.


the prim and proper ikea gusle paper lantern

the important thing is to remove the bamboo sticks from inside the ikea gusle lamp to avoid shadows on the stamps. keep the top ones to retain the shape. stick on the stamps, flip the switch and voila!


martine's nudie postage stamp lamp

now, if only i can get my hands on some vintage nudie stamps. link.

long stemmed utensils finally get their place in the kitchen

christina tipped me on this hack from notmartha. the very crafty megan turned an offending wall into an ultra useful and totally lovely utensil wall. if i ever do spend enough time in the kitchen, i'd love to have some thing like this too.


the middle row features grundtal bars and solid non-ikea canisters

she writes: "the one thing i knew i wanted for sure was a way to store utensils - spatulas, spoons and kitchen scissors - right there for me to grab. ... i considered using the grundtal cutlery caddies from ikea for this, but they are just too shallow to hold long-handled utensils, they would have just tipped and fallen out."

finally, she opted for solid stainless canisters from storables and found a way to attach them to the bars with wire cables and ferrules. neat.


click here to see it in flickr with notes

go here for notmartha's fail-proof step-by-step instructions on how to measure and attach the cables with just the right touch of tension to keep them in place and slack to let them slide across the bar.

ding3000 pimps the billy bookcase

got billy?

i think almost everyone i know has one or two units of ikea's billy bookcases. so it is no surprise that ding3000 decides to pimp up the world's no. 1 shelving unit. 35 million units of this ubiquitous furniture is already sold worldwide and counting.


the billy wilder shelf is meant to be a playful interim storage place for unsorted books, magazines and newspapers. the haphazardly growing shelves supposedly makes billy 'wilder'. i must say i like it a lot. sure beats ikea's boring square shelf inserts and almost makes billy "designer-ish". heh.

the other pimp is the billy heidenreich - a rack with a lectern. if my memory serves me right, ikea used to offer something similar, no?

to purchase these billy add-ons, go here.
thanks erika, for the lead.

coke bottle lamp

hi! am back from my break. which flew by just too quickly. don't holidays always feel that way?

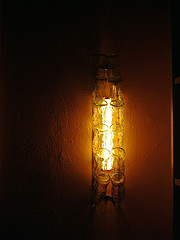
anyways, here's a new one from klaus. i like the retro/vintage feel of this coke bottle lamp and it would look great mounted in the kitchen or bar area.


basically, what you need is an ikea rationell pot lid rack, a long filament tubular incandescent bulb (ie. linestra lights. klaus found his at a hardware store, complete with mounting, for about $10) and 12 small contour coke bottles.

how to:
  1. cut the horizontal bits out of the lid holder
  2. bend it until the sides are parallel. click for steps.
  3. mount lamp on wall, mount holder around it
  4. bend the spokes to point almost straight up, and stick the bottles in.
experiment with bottles of different colours and shapes and you may get even more surprising results.

and so i'm off for some sun

hello peeps
i'm on vacation from today till next weds. will be basking and sipping margaritas on a lazy stretch of tropical beach. i promised myself no blogging no hacking, at least, for a bit.

back on thurs, with a nice tan and spanking new hacks.

in the mean time here are some previous hacks which deserve a rerun:
> the ikea bag hack
> home made cinema screen
> cheap yet chic stair lighting
> post-it lamp shade
> dressed up billy bookcase

image courtesy of leylop

a basketful of light

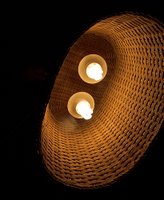
want a touch of tropicana in your home? these ikea basket lamps from riddim may just do the trick.

riddim tells you how: "you take a basket, drill two holes, cover them with hot glue (to prevent the basket from falling apart), put a special threaded pipe through the holes, put a cable thru the pipe. attach a hook for hanging, then the bulb sockets and finally attach the connectors to the end of the wire."


can't find the link to the basket riddim used but i think the alkov would make a great lamp shade too. also check out riddim's lamp made from a washing machine barrel. way cool.

click to see more photos.

freshly papered back for your ikea bookshelf

kelly bought an ikea markor bookcase from craigslist but it came without a back. but never fear, craftiness to the cure. and kelly is spot on - adding color and pattern to the back of bookshelves, closets and wardrobes are all the rage now.

"i had been wanting [a bookcase] for awhile, as it's much prettier than the stack of milk crates we've had in the office for the past year holding my crap. at any rate, the bookcase was in good condition, but it didn't have a back. so i took the opportunity to get crafty and i glued some paper from paper-source (of course) to some posterboard i had.

ikea markor with papered back and close up of paper pattern

i did learn a little crafty lesson on this one: pva glue is a bit heavy for gluing paper to posterboard. alas, i should have used the ever-brilliant this to that for gluing advice. for 'an absolutely wrinkle free result', i should have used 'yamato sticking paste'. i also could have used 3M 77 spray adhesive, but i have had spray adhesive disasters in the past (don't ask), so i probably would not have done that. i had pva, so i used it. the whole thing got really wrinkly.

fortunately for me, it was one of those all-too-rare crafty projects where, even though it's just about the sloppiest thing i could have possibly done, it didn't make a damned bit of difference... because you can't. even. tell. i LOVE that!

also, i think i would recommend using a slightly stronger back - perhaps a thicker cardboard. i had posterboard on hand, so that's what i used. oh, and i used a staple gun to attach the back, but those little ikea nails would do too." link.

potholder makes good as pinhole camera

this is quite a hack from david. a pinhole camera ingeniously crafted from an ikea bjuron plant pot holder and a coke can. besides being dirt cheap, the picture quality is not bad. not bad at all.


the pinhole camera is "made from a bjurön, which is a 14cm x 14cm wooden box with a galvanised tray loose inside intended just to hold pot plants. i cut the height down to get the focal length / field of view i wanted. then i used the bit i cut off plus a scrap piece of pine as the back.

a 2" hole was cut into the bottom, and a smaller hole drilled in the the tray which was then screwed to the inside of the box. the pinhole itself (a section cut from a coke can) was taped to the tray. i found some matte black paint for the inside and varnish for the outside in the garage. the toggle catches came from a local hardware store and were the most expensive parts!

it uses 5"x4" sheet film which has to be loaded and unloaded in complete darkness. the design has evolved since the initial build with light baffles and film holder made from black card."


i'd say, the results (pics above) are simply beautiful. link to david's gallery. (link updated 9/6/07)

how to paint plastic?

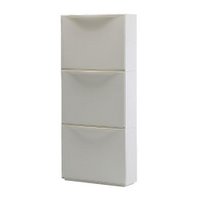
ikea trones shoe storage"so i have the trones for shoe storage at my landing strip. i bought them in cream as they matched the wall and sort of disappeared. now i've gone and painted that wall a light brown color.

i really need help on painting the trones. how can I do it? will the paint stick? is it better to spray paint or can i use the same paint that i used on the walls and apply it with a roller?" - peacelamp

peacelamp,
as the trones shoe storage is plastic (polypropylene), i would suggest that you buy paint made for plastic, rather than use your wall paint which may not adhere. krylon fusion for plastic is a possible one and comes in an easy to use spray can. but colors are pretty limited so you may not get an exact match to your light brown wall.

how to paint:
  1. clean the surface real good with a mild detergent, rinse well and dry. make sure that it is completely dry.
  2. spray on a thin coat, covering it evenly.
  3. let it dry thoroughly and then apply again. applying multiple thin coats of the krylon paint will prevent runs and drips.
but if you're keen to make the storage stand out rather than disappear, you could try stencils. or decorative painting with plaid paint for plastics. a simple trim in perhaps a darker brown could be potentially chic.

have fun!

related post:
> view all other hacker help questions

ted's terrific sideboard

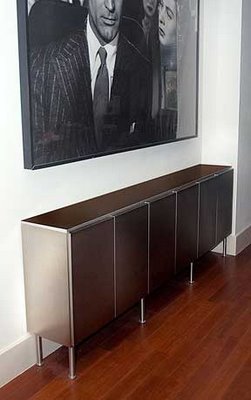
i'm loving this sideboard sent in by ted. sleek, sexy, and if i may say so, almost un-ikea, if not for the giveaway capita legs.

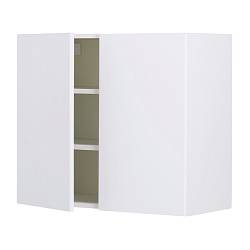
ikea akurum"i 'hacked' the ikea akurum kitchen wall cabinets to create a sideboard. originally the sideboard was wall mounted 8" off the floor, which was a nice sleek effect. after moving twice, it is now on capita legs.

i used the numbar (can't locate this on the ikea website and also not totally sure of the name) stainless steel doors which are not normally listed for the wall cabinets. since they are the same size as some of the base cabinets, you can just ask them to substitute it instead of the options listed.

i then created an ebony-stained ash-veneered top, trimmed with standard aluminum edging from a hardware store. the sides are stainless steel which was custom cut and bent by a kitchen supply store in williamsburg, brooklyn. they were attached with high-tack epoxy.

The ash wood was used to create the table top. The stainless doors were kept as is. The wood top was trimmed along the edges with the aluminum to make it more finished and to coordinate with the stainless doors. "


and the result is simply gorgeous. understated, elegant and fits the nook beautifully.

a touch of class for ikea mini chests

another ikea mini chests hack and this one by trixi totally rocks. i'm loving the pattern, color combo and very smart idea.


"first I painted it white," says trixi, "then i took those beautiful habitat paper napkins (which were part of a present I once got - and they were too pretty to use them only as napkins and throw them away afterwards).


i cut them into pieces to fit the drawers. next i placed the square pieces on the front of the drawers and painted them with clear varnish to fix them. that's it!" link.

related hack:
> ikea mini chests with paste-on panels

ikea fira mini chests get hot new looks

i've always loved these ikea fira mini chests. though i have no use for them - i find them too deep for jewelry, too small for stationery - but still i love them because they seem so infinite in possibilities. and full of potential prettiness under crafty fingers. i knew it was only a matter of time before i found a nice hack on the mini chests. true enough.


mini chests before their makeover

here's melisaur's take on them. love the pasted on panels of patterns. and it's probably a lot easier than painting. not only that, three months down the road, should you tire of them, just tear them off and paste on the pattern du jour.


mini chests with their hot new looks

click here for her step by step tutorial on flickr.

an easy peasy ibook stand

was browsing flickr i found this really cool ikea hack by suh-weet! it's an ibook stand made from an ikea cd stand (i can't locate the product on the ikea website.)

anyways, here's how it's done.


just turn the cd rack upside down. then use an old book to fill out the hollow space.


paste a non-slip material (which comes together with rack) to form a base for the ibook to sit on.


and voila! your ibook hangs cool. click here for flickr pictures.

woo! an ikea skirt

thanks to erika, who spotted this wonderful hack, you can now not only live ikea, you can wear ikea too. ironically, this is from melissa of fehrtrade, who was absolutely hates ikea yet was dragged into what she calls the 9th circle of hell.

on her blog, melissa wrote, "across the warehouse-wasteland expanse of the store, a bold red print called out to me. but on further inspection, the print belonged to just some pillowcases. how disappointing! or, what if i could somehow turn those pillowcases into something wonderful?


it took an evening, but out of two pillowcases and a bit of bias binding, this skirt emerged (and because the pillowcases each had a zipper, i’ve got an extra now!)

very nice. i'm tempted to make one myself too. link.

***

vreni's version (updated feb 4, 2008)
using the alvine fro. link.

hacking a two level lack media unit?

i received this email from ehsan asking for hacking advice or suggestions. he has a pretty well thought out ikea media unit hack and has even photoshopped how it could possibly turn out. but has some doubts that needs clearing.

"i wish to combine two lack shelving units to make a media storage for my new tv (which i have yet to buy) and av equipment.

i am buying a 46" lcd tv soon, and while my current ikea kaxas tv bench could hold it, i have nowhere to put the center speaker (right now it rests on top of the tv). if i could wall-mount that would solve everything but i can't, so i need to make a stand that can hold the tv, plus the center speaker beneath it, plus some other large av components.

this is a photoshopped depiction of my idea.

the main modifications i need to do:
  • combine two lack shelving units into one (horizontally) by removing one of the long panels on the second unit and attaching it to the first one
  • on the first (top) unit: removing the center shelf then moving the other shelves closer to the middle, to create three larger spaces instead of 4 small ones
  • on the second (bottom) unit: rearranging two of the shelves to make the two middle spaces wider
what I am concerned about, and hoping you or your readers might be able to give advice on:
  1. will this configuration be sturdy enough to hold a large lcd tv (approx. weight is 79 lbs. or 36kg) and some other hefty components (HTPC probably the heaviest, about the same weight as a regular full-sized pc) without buckling, bending, etc., especially after i remove one of the shelves from the top unit. ikea says it has a max load of 110 lbs. or 50kg, but doesn't specify if that's when the unit is horizontal or vertical.
  2. i believe the lack is constructed with cardboard inside. it comes with screw holes for the end and middle shelves, and dowel holes for the two inner shelves. if i need to attach the shelves in different positions, i will need to make new holes. are the pre-drilled holes reinforced somehow? will my new custom holes be nothing but holes in carboard, and thus not have any strength?
  3. would it be better to install castors or rest the unit flat on carpet?
  4. a simpler approach would be to just rest one unit on top of another, instead of making them share the long panel - i think it would not look as good, but would it be better for strength / stability?
if i end up attempting this i will be sure to document it and share my results." - ehsan

phew! this is quite a project. my guess, and it is purely a guess, is that it will hold the weight if you position the center uprights in places where it has to bear the highest load. so if your tv base can somehow spread across the two uprights below, it may just hold.

as for what's inside lack, your guess is as good as mine. matt in his hack did reposition his center upright further in and it was okay.

for a tall unit loaded with heavy (and expensive equipment), i would not recommend castors. and i totally agree that your version looks better than just stacking a lack on top of another.

i've already reserved a spot for you on this site, should you attempt this. all the best, ehsan.

and now over to you peeps, any suggestions / advice / cautions?

> view previous hacker help questions

Check out this stream