Showing posts with label spray paint. Show all posts

Photographs: My favorite art

Well hello all! Can you believe it’s almost the weekend already? I swear this week has absolutely flown by.

I got one project completed this week that I’m really, really happy with. (GLEE!!) And I did most of it with what I had, which is always a bonus in my book. :)

When it comes to filling wall space, we don’t have much real art in our home. OK, let me rephrase…we have ZERO real art. :)

An outlet Ballard Designs piece is the closest we get to actual art. Instead I’ve fill our walls with a bunch of molding and lots and LOTS of pictures. Bunches. Gaggles. :)

Photographs are my very favorite art. They’re cheap (most of the time I print them out at home and almost all frames are from Goodwill), they’re easy, and they add a personal touch to our home that no art could.

I’ve grouped framed pictures in almost every room in our house. The playroom:

playroom photo wall

See that squishy face? That’s my baby:

IMG_3162

The cowboy is my Dad as a boy. I could die. :)

That wall of photos is getting a redo soon. I may move the shelves around and am definitely adding new photos throughout.

I filled an empty wall on our stairwell with photos as well:

image

Don’t worry…the mice are gone. As much as I HEART them. :)

And I used photos in a wall in our bedroom as well:

image

You can see they’re usually hung willy nilly. I like the scattered look when it comes to framed photos, which is REALLY weird for me, since I’m the symmetrical queen.

When I started the impromptu redo of the living room, I knew exactly how I wanted to fill the space between the windows. I took at look at the colorway on the fabric I picked for the drapes for some color inspiration:

IMG_3208

I big fat LOVE when they do that! It makes it so easy to work with. You’ll notice there’s 16 different colors in this beautiful fabric, which gave me plenty of options to choose from.

And it turns out, I already had exactly what I needed. :) About eight months ago, I started collecting frames at Goodwill for an idea I had for the living room. I even spray painted them months ago – I bet it’s been about six months.

But when I tried my idea in the room, I didn’t care for it (more about that later!) and left it sitting for months. And wouldn’t you know it – the colors I had already painted the frames worked perfectly for my new idea:

photo art wall

I love using what I have. And I love it even more when the spray painting is already done. ;)

I started finishing off this spot with a Goodwill lamp – it was blinding me with it’s brassiness at the store, but I knew it could be a beauty:

Goodwill lamp

Doesn’t it have the loveliest curves? Oh, she’s so darn pretty. :) I sprayed it with a primer and then a couple coats of Rustoleum’s Heirloom White. I had the shade, and added a ribbon from my stash around the bottom. I love how the color in the ribbon is an exact match to the light brown in the drapes.

That is what I’m talkin’ about! Totally by accident and it worked great. Whooeee!!

I kept the accessories in the HomeGoods tray simple. I didn’t want them to compete with the art:

Homegoods tray

The rattan ball was a couple bucks on clearance at Pottery Barn years ago. The books are those faux books, and I covered them with a linen fabric last year.

The art is my very favorite part! They’re all shots I took (with my point and shoot camera by the way) last year:

I used a few of the wildflower shots (from our neighborhood) and a leaf from a hike last fall. I was going for bright colors that worked with the drapes. LOVE.

I don’t even use mats most of the time – I just cut out white paper and use spray adhesive or double-sided tape to mount the photos right on top. You can’t even tell they’re not the real thing!

Like I mentioned, I usually print my photos out at home (and usually just on basic printer paper), but this time I splurged a little bit. I uploaded them to Walgreens.com and picked them up an hour later.

Uhh, hello?? How have I missed this fabulousness all these years? I knew about it, just never did it. And I’m now hooked. I think the five pictures were about $12.

The new art is the perfect finishing touch for that part of the room:

I’m so in love with it. I smile every time I walk in this space.

There’s still much I want to do – not sure that mirror is staying on the right (it’s a little small). You’ll see a peek of a Goodwill coffee table that’s waiting for a redo. And there’s pillows to make as well. (I am going to attempt to make a pillow with a zipper people.)  ;)

And if you look close enough, you’ll notice the drapes are different lengths, still aren’t hemmed (will they ever be? I don’t know, I don’t know!), and there’s a few holes in the wall I need to paint over.

I was able cover most of those with the frames though. YESSSS.

Because you know I’m a lovah of before and after pics, let’s check out the difference so far, shall we? The dark before:

And with new drapes and a little reworking, the now:

bright living room

BOO.yah. LOVE it.

I know many of you are loving the fabric as much as I am – I got it from Calico Corners and it’s P. Kaufman fabric:

P. Kaufman fabric

I’m trying to find it online and haven’t come up with anything yet. I’ll let you know if I find a link!

So, do you use photos as art in your home? I know one thing – if we ever sell our house, the realtor is going to have a heyday with us. Aren’t you supposed to depersonalize? We’ll have LOTS of empty walls! Or they’ll just have to deal.  :)

P.S. The lamp shade on the side table was a vintage find years ago. Isn’t is perfect?

P.P.S. The spray paints/colors I used on the frames were Rustoleum’s Heirloom White and Espresso and Valspar’s Everglade.

Winners and project FAIL

Howdy all! First of all, the two lucky winners of The Rusted Chain giveaway are…

Kaitlindsay from Brighter than Sunshine and Kristine from Random Robb Stuff.

Yahoo! Ladies, please email me at thriftydecorchick (at) gmail (dot) com and I’ll get you in touch with Beki. :)

Well, all of my projects are not peaches and pink flamingos and fluffy clouds. Some fail miserably, and I try to show you the good and the bad along the way. (Coral and aqua cake anyone?)

:)

Anyhoo, I was SO bummed the other day, because one of my most recent (and favorite!! Pout.) transformations had turned into a total FAIL. And I knew I had to show you so you could avoid a similar fate. (Sniff.)

Remember my beautiful Goodwill pitcher?:

 Goodwill pitcher 

Well, I went to empty out the tulips and water the other day, and when I grabbed the handle, something crackled.

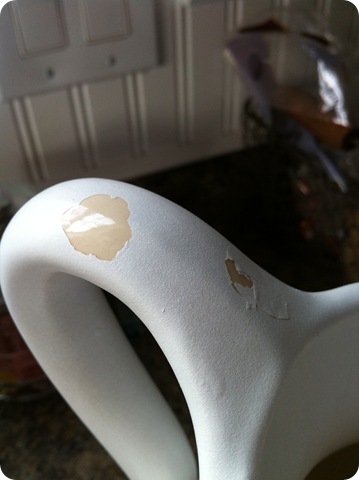
Crackle? What the heck? I looked down and saw a bubble. I touched the bubble and this happened:

painting ceramic

DUDE! I was so bummed out! My initial thought was that I could sand it down and respray it.

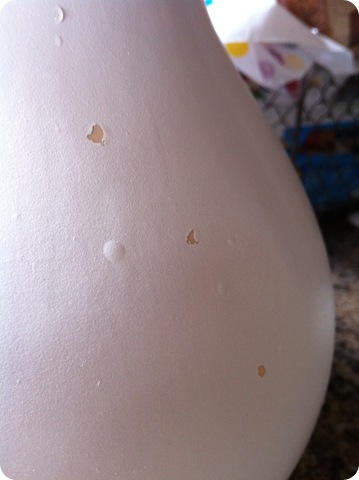
Then I looked some more and found these:

Little bitty crackley bubbles ALL OVER it. It looked like it had the mumps. :(

Like that wasn’t bad enough, I happened to put my hand under it, and noticed it was a bit damp.

Looked at my beautiful butcher block and it looked like there had been water sitting in a couple spots.

Curses! Shakes fists in air!!

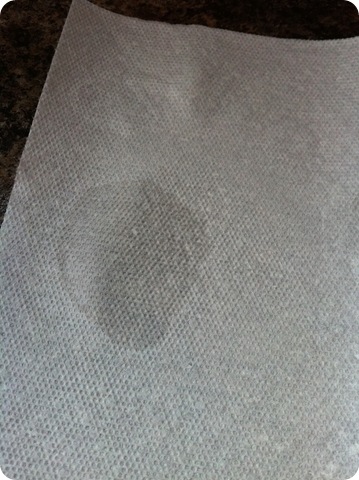
I thought there had to be another explanation for it it, so to test it out, I placed the pitcher (filled with water) on a paper towel for a day. When I lifted it up to check later, I found this:

The darn thing was LEAKING. On my wood island countertop – for a week. Oh, you gotta be kidding me.

Thankfully, a little sanding and drying time and the spot on the butcher block is gone.

But now I know why the pitcher was at Goodwill in the first place. (SAD FACE.)

I primed that thing within an inch of it’s life, so I guess ceramic just doesn’t take it well in general. Any experience with this?

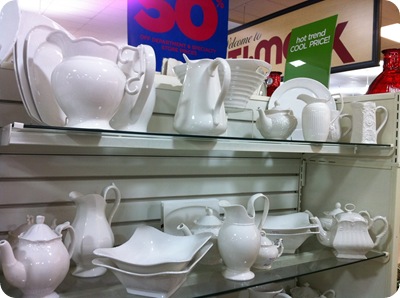
And of course, by then I was completely loving the idea of a pretty white pitcher on our island, so I was on the lookout for a new one. I found a HUGE selection at HomeGoods:

So many beautiful options! Aren’t they pretty? All were $9.99 but were about half the height that I wanted.

And then I remembered that a reader had mentioned one she found at Target. I don’t need to be told twice to take a trip to Tarjay, so off I went. And I scored this beaut:

Target pitcher

She’s not as wide as the other one, but she is taller. And still has a graceful handle that I love – all for $13. :)

I have now checked underneath it about 95 times, but all is well:

So…sometimes – once in a while -- thrifting bites you in the butt. But I’m willing to keep taking my chances. :)

Speaking of a trip to HomeGoods, last week I met two readers while shopping  – Valerie and Carolyn. They were just the coolest, and it was so fun to chat with them:

Well, that’s me and Valerie. Carolyn was taking the picture.  ;)

We ended up talking for a while, and it was absolutely insane what a small world it is…I graduated from the same high school as Carolyn, and turns out her brother was in my class.

SO CRAZY.

Carolyn wrote about our meeting over at her blog here. (They crack me up.) And I’m warning you – you’ll be swooning over her bathroom redo. Here’s a peek:

Ack! Gorgeous! (Jealous!!)

So fun. So if you think you see me shopping at HomeGoods in Indianapolis, come say hello!!  :)

The Organize It Party will go up Monday evening, so get those posts ready!:

Organize It Basket2


Have a fantastic weekend! I’ll be thrifting with some girlfriends at my very favorite spots in all of Indy – Midland Arts and Antiques. Can’t wait!!

P.S. Thanks to Click Studio for finding my linen closet light bulb! :) You can see it here.

P.P.S. I am working on finding out more info about the fabric I used in the living room. I’ll let you know next week!!


Do you love Pottery Barn and Ballard Designs?
You’ll LOVE Knock Off Decor!

February Before & After: A pretty pitcher

header

Hello all! I’m back this month with a very simple but beautiful (I think so anyway) before and after project!

It started with a recent trip to Goodwill – I don’t go as often as I used to (see my STUFF post), so I haven’t found nearly as much good stuff as I used to. (You have to go fairly often to get the good pickins.)

But that day, the heavens shined down on this beauty on the top shelf: Goodwill pitcher

Ummm…OK, well the shape was beautiful. I guess the flowers weren’t that bad, they just weren’t what I was  going for. :)

But the size, the lovely lines, the beautiful spout – they had me at Hello.

I knew I could spruce her up with a few coats of spray paint. And a “few” coats turned into about eleventy billion. Or so. Maybe about seven. Whatever.

It took five coats of spray primer to get those purdy flowers covered up. I did an additional two coats of a glossy white on top.

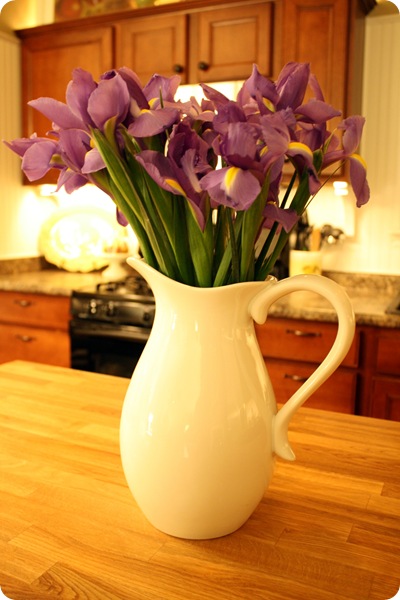
After trip to Trader Joe’s for some (fairly) cheap tulips, I was able to bring my vision for this cutie to life:

Oh SWOON. Just…swoon. I am so ready for tulips people. I actually don’t mind the snow that much – but we’ve been hammered with it and ice over the past couple of months (way more than usual) and I’m really starting to miss green grass.

Will I ever see it again?

I don’t care what Punxsutawney Phil says, I think it’s gonna be awhile.  :)

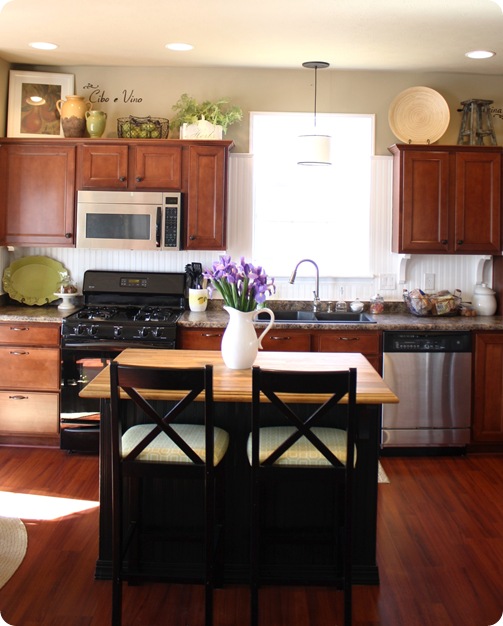
Even with the meeeellion coats of spray paint, this is one of my easiest and favorite spray paint transformations yet:

pottery barn inspired pitcher

I wish I could have gotten some shots in the daylight, but we got home from dinner too late. I’m ready for more photo taking hours in the day too, while we’re talking about spring. :)

I absolutely love the pretty shape – looks like it came out of a Pottery Barn catalog doesn’t it?

Only their version -- $39. Mine? A whole five buckaroos. :)

WHOO HOO!

Now, I won’t be pouring any lemonade with mine – it’s just for holding beautiful flowers. And I’m totally OK with that.

Ikea butcher block

I just LOVE IT.

Soooo…my before and after for the month – a Goodwill find transformed with my beloved. My BFF. Spray paint:

pottery barn inspired pitcher

Now it’s time to see what you’ve been up to!

Be sure to link up to your post, not your blog. And I’d love it if you’d include this pretty little button and a link back to this post:

beforeAndAfterButton I’m trying a new linky this time, so I hope this works! :)

Have fun – I’ll leave this open for a week, so link. it. up!


Making the old new again (spray paint love)

Well, since it was seventy-stinkin’-five degrees here today, I figured I may as well take advantage of it and spray paint something.

In my flip flops. And tank top.

Grrr.

I know…it’s awesome and all, but I’m already missing my sweaters. I was just getting used to cozy again. :)

Anyway, when we built our house, we upgraded the elevation, (exterior of the house) but didn’t add any extras to the curb appeal – landscaping, lights, etc. So I did a few updates soon after moving in:

I took out the cheapy bushes that were about two inches tall and replaced them with azeleas and lillies, then added landscaping lights and bricks, and installed window boxes.

MUCH better.  :)

I also replaced our look-away-from-the-shiny!! brass coach lights:

OK, they weren’t even as nice as that picture. They were way too small for the scale of our house and they were practically blinding us with their brassy-ness. Brassiness? Huh? Whatev. They were ugly.

Anyway, I replaced them with much larger versions that were a pretty, dark bronze color:

Well, they were a pretty dark bronze color. It’s been about six year since I installed them, and they sure look their age:

In my book, the only thing worse than shiny brass coach light is a pink coach light.

Back in the day, they matched the light on our porch:

We don’t get much full sun on the front of our house, so I chalk it up to the fact that they were fairly cheap inexpensive six years ago -- $40 each I think?

So because I still love the size and design of the lights, I had a little idea in my noggin. On a recent trip to True Value, I checked out the fantabulous spray paint aisle:

spray paint!

I know. Stop drooling. It rocks. If you can’t find it there, you can’t find it anywhere.

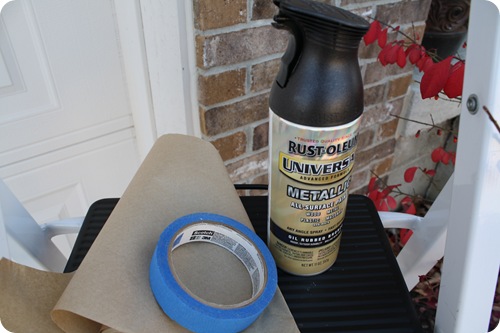
I knew I wanted the lights back to their original dark finish so they would pop off the brick. I checked out a few oil rubbed bronze options and it turned out my old stand-by can be used indoors and outdoors:

Thankyouverymuch Rustoleum! And True Value! Kisses.

I thought I could just take the top off the light fixture and remove the glass, but that wasn’t working. I had to pretty much take the whole thing apart:

I set all the parts aside and cleaned everything well. Even more of the finish came off as I cleaned:

And this is the part where I am taking pictures of a dirty paper towel in our front lawn, realizing my neighbors are wondering why in the world is Sarah standing outside taking a picture of a dirty paper towel in her front lawn.

I would love to know what goes through their heads. You know what…maybe I don’t. :)

I picked up a roll of paper at True Value as well, and taped it up all around each light:

YES…I know I could have just taken the lights down. But that would have taken more time than just slapping some paper up there. And it was extra fun because the paper taped to the garage caused quite a few what-is-that-chick-doing? looks as folks drove by. :)

A sweet little girl from down the street even walked down to ask why I had paper all over the house.

It’s hard to explain the power of spray paint to a sweet five-year-old. :)

I put the parts aside so I could spray paint them separately:

I did two coats on everything – making sure to use very short, light sprays. I didn’t even use primer – I figured if the ORB paint ever wore off, I’d rather the pinky tone show through than white primer. :)

The result?:

Oh. Em. Gee. LOVE:

oil rubbed bronze lights

I ended up giving the glass a good cleaning – wow, they were nasty. Now the lights are about ten times brighter, which is a bonus. :)

They pop off the house now, AND they match the porch light again too:

spray painted coach lights

I like the new finish even better than the old one, so I may spray the porch light as well.

I think coach lights this size in a similar look are going for at least $50 each now – so I figure I saved $100 by just painting them.

Can I get a hollaaa for spray paint? Whoop! Love it!

Now, I have no clue how this will hold up. Even though the can says you can use it outdoors, you never know…but even if they last till next summer, I’m totally happy with that!

It took about an hour to finish, so yet again, the investment was in my time. And one hour to save $100 works for me!

I think they look SO much better, yes?

Check out that clean glass! You can actually see the light bulb now -- I swear, it’s the little stuff that makes me so happy. :)

Have you saved some cash with spray paint lately? Spill it!


*I was one of the bloggers selected by True Value to work on the DIY Squad. I have been compensated for my time commitment to the program as well as my writing about my experience. I have also been compensated for the materials needed for my DIY project. However, my opinions are entirely my own and I have not been paid to publish positive comments.*

Thank you to my sponsor!:

Check out this stream