Showing posts with label Gorm. Show all posts

Dolly bunkbed


Materials: gorm shelves

Description: I decided to make a dolly bunkbed for my daughter's dollies by using two sets of Ikea gorm height extension posts and two short three plank gorm shelves. Simply made two mattresses out of fabric scraps bound with the Ikea iron-on hemming tape and filled with polyfill. The blankies were cut from an old Ikea fleece blanket. My daughter's pretty chuffed with them, alright!

~ Izreen Ismail, Kuala Lumpur, Malaysia

Gorm (almost) cabinet


Materials: Gorm shelf; Vitaminer Rand fabric; Behandla paint; some plywood (not Ikea)

Description: My son (9 months old) loves to open and close doors.

I put in his room an old, little ( 61 cm) Gorm shelf, with two shelves, painted in red (Behandla paint, of course!): but shelves don't have doors!

So I found in my lab a couple of pieces of plywood 3 millimeters thick, and I cut out a back panel, which I nailed to the shelves' back side.

I cut out two plywood panels, 15 mm thick, and hinged them to the front legs of the shelf.

Last, I painted everything with red Behandla.


My wife cut out two pieces from a Vitaminer Rand fabric, hemmed them and then I nailed them on the two sides of the "cabinet".
Finished!

~ Marcello Racchini, Lissone (MB), Italy

Lay-away your endless cardboard!


Materials: 5 Gorm 1'x3' shelves, hand saw, mallet, workbench vise, electric screw driver, 14 drywall screws, 4 'dowel' screws, 2 wall anchor screws, wood glue

Description: Shelf Your Recyclable Cardboard... with this quick, fun project: Storage and binding station for your pantry, mud room, or garage.

Assembly time was about 2 hours:

1) Set aside (intact) 4 of the 5 Gorm 1'x3' shelves.

2) Using a workbench vise (or a work table and a clamp) with a hand saw, cut off 1 of the 3 slats that make up a 1'x3' Gorm shelf section. Do this as follows.. this the only challenging part of this project!:
a)clamp down the shelf so that a 1' long edge is on horizontal to you and on top, and the 3' sides are vertical. b) Refer to the attached pictures ("Gorm 1ftx3ft shelf.jpg" and "Cardboard recycler_Side view.jpg")


You will be cutting the L-shaped molded edge piece and not the slat itself: Locate the first 'gap' between the slat you are removing and the middle slat. c) now angle the hand saw blade so that you are cutting the L-shaped molded edge from against the slat you are 'keeping' outward to up against the middle slat. d) Turn over and clamp down the 1'x3' Gorm shelf section and do the same cut to the other L-shaped molded edge on the other side -- but make sure to have the angle of the saw blade and the cut itself match the direction of the cut done in able step c. That done.. the 'difficult' part of the project is complete!


Click to read more>>

Good ol', cheapo upholstered Gorm Bar


Materials: Gorm Posts, Gorm Shelves, Gorm Corner Shelf

Description: This is I and my husband's first hack. After weeks of trawling through this site, I managed to convince DH that building our own bar would be cheaper than buying a new one.

We wanted an L shaped bar and thought about using expensive IKEA pieces for this, but settled for good ole, cheapo Gorm.

Supplies:
2 51cm GORM corner shelves - $26
8 51 x 77cm GORM shelves - $56
8 31 x 77cm GORM shelves - $40
24 packs of 110cm GORM posts - $96
Packet of screws - $9
Fabric - $16
13mm MDF sheets for the top of the bar - $13
Staple gun and staples
Hand drill

Total: $256

Click to read more>>

A Gorm guitar shelf


Materials: Gorm

Description:
This guitar shelf took me about 3 hours to make from the shelves I bought in IKEA. The main step is making the original shelf into the way that you can see in the picture above.


And there's a important point on this guitar shelf that's how it was done completely. To buy a bottle shelf and place it on the bottom. Then you can just put 8 guitars or basses you want. By the way, these all cost me $1000NT.


See more of the guitar shelf.


~ herguitarcraft

Super Rabbit Condo


Materials: Gorm Shelving, wood trim, hook latches, hinges, staples, furniture tacks, steel mesh, galvanized wire


Description: After adopting our new English Lop, my husband decided to take on making a cage that would be functional with our space and give her as much room as possible.

We used The Gorm shelving system:
2 longer shelves (Width: 30 3/8 "Depth: 20 1/8 ")
3 shorter shelves (Width: 19 5/8 "Depth: 20 1/8 ")
3 corner shelves (Width: 29 7/8 "
Depth: 20 1/8 ")
9 Posts (Height: 43 1/4 ")


We assembled the shelving, and then attached steel mesh to wood frames using industrial staples and furniture tacks. He then drilled these frames into the Gorm in sections. We made door frames and attached the galvanized wire via staples. We attached the doors with hinges and latches. They open and close with latches.

We added a long ramp so she could run up and down to the second and third level.


Finally we laid down rubber on the bottom and covered all shelves with carpet.
The best thing is we can continue to expand it as she grows in both length and height!

Total cost about $150.00

~ Elsa, New Jersey

More desk space for less money


Materials: Gorm post, Lack table, Ekby Laiva shelf

Description: I needed more space for my desk, which was just a table top with trestles, so not very helpful to put stuff in there.

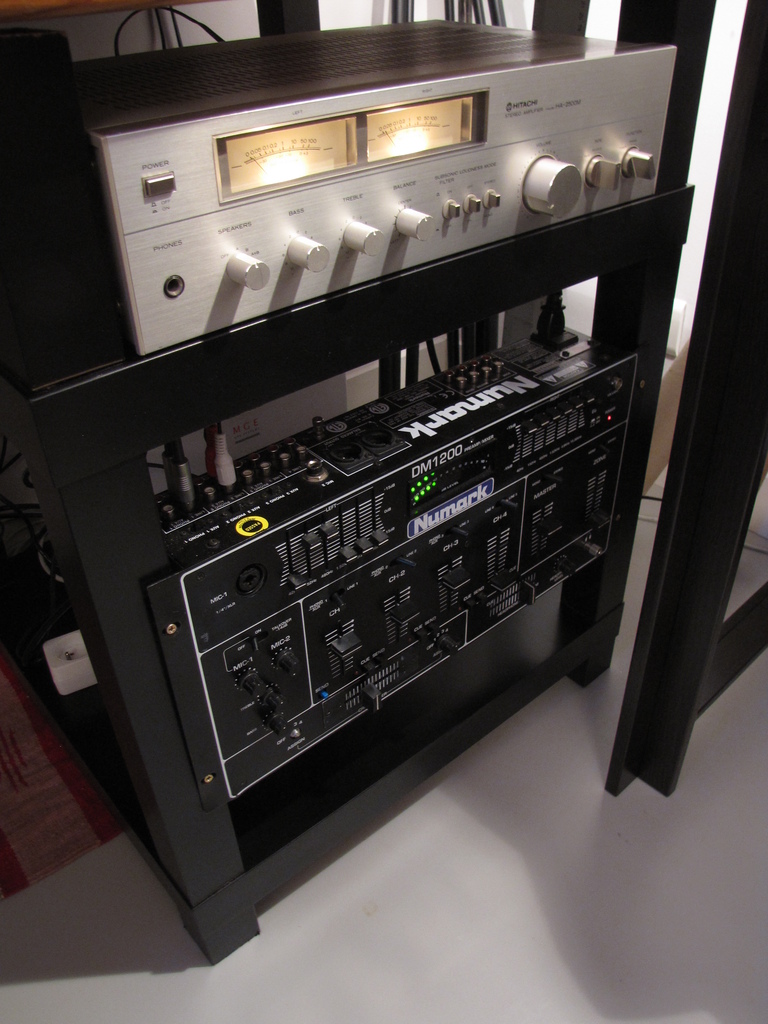
After some sightseeing on the Ikea website I came with two ideas. The first was made from two Lack tables to make something which can fit my hi-fi amplifier and sound mixer. The second one is a small shelf for my computer made from two Ekby Laiva shelves and a pack of two Gorm posts.


To make the computer shelf, you will need a pack of two Gorm posts of 174cm (2,50 EUR) and two Ekby Laiva shelves (59x24cm, 2 EUR each). Cut the Gorm posts at a length of 70cm, and you will have four posts of 70cm each and 2 pieces of 34cm each. Cut those two pieces at a length of 24cm. Then just assemble the whole with screws :

- screw the 24cm piece of Gorm between two 70cm Gorm posts, it will be the top of the shelf
- do the same for the other piece and 2 other posts
- screw the Ekby Laiva shelves at whatever height you wish

You may need to paint in black one side of the Ekby Laiva shelves if it's gonna be visible.

To make the desk rack, buy two Lack tables (4,95 EUR each). Cut 4 posts like this :

- 15cm from the bottom
- 5cm from the top


Take one Lack top from the side which is not painted and drill two holes through the top, each one should be just one or two centimeters from the existing hole.

Screw the 15cm posts to this top. You will need screws of at least 7cm.

Assemble the four "normal" Lack posts to this Lack top, just like assembling a normal Lack table.

Take the second top and drill holes like for the first one (only one hole will be okay this time, you don't need to drill two). Then screw the second top to the bottom of the frankenstein-thing you just assembled before.

Now assemble the four 5cm posts to the bottom of the second top just like a normal Lack table.

There you have it. It's cheap, functional and pretty solid, and it will work with all desk tops from Ikea.


~ bohwaz, Dijon, France

Functional black Gorm workstation


Materials: (4) 19"x20" Gorm Shelves, (2) 19"x12" Gorm Shelves; (2) 30"x12" Gorm Shelves; (4) 68.5" Gorm Posts, (10) Ekby Valtar brackets in black, (3) 8'x8"x1" boards, (2) 10'x12"x1" boards, (2) 4'x8"x1" boards; black paint; cherry wood stain; polyurethane; L brackets; Kasset Black boxes

Description: My husband and I needed a good workstation for the both of us. We had a lot of books, and wanted to incorporate them in a clean, simple way. I came up with my Ikea hack from this other desk hack here. I really preferred black and dark cherry stained wood (the top is cherry, although it looks black), plus we wanted to be able to spend as little money as possible. The Gorm unit was the cheapest I could find.

So we gathered all of our supplies, which included needing to go to Lowes and getting many cedar boards. We painted all of the Gorm shelves black, as well as 2 of the 8'x8"x1" boards.

We then cut the Gorm posts to the right height. This was actually kind of scary because all of the holes needed to line up perfectly, which a few didn't. So I sanded the ends to make everything even. It was a lot more work than one would have thought. I also sanded the planks of wood that would become stained.


At this point, we began installing the units. We put the Gorm pieces together, as well as attached the Ekby brackets and black shelves to the wall.

To attach the planks of wood together, we used leftover Gorm pieces. We actually did not drill through the predrilled holes in the Gorm posts because we thought it would be stronger.

From there we attached the top to the L brackets, put everything away, and Voila! A new desk!

See more photos of Lauren's Gorm workstation.

~ Lauren Ellis

Korean guitar pedalboard


Materials: Ikea Gorm shelves and planks, velcro, screws, brackets...

Description: I took the IKEA Gorm shelves and made a pedal board from them for guitar effects pedals.

1.) Buy the following masterials:

3 Gorm shelves
1 Gorm plank set (2 planks)
4 large l-brackets
8 small l-brackets
6 horizontal metal coupling plates
many many wood screws
Spray Paint of various colours, and primer/finisher
home-made stencils!

2.) Cut 1 Gorm shelf in half


3.) Attach each half to another gorm shelf using metal couplers and wood screws to make two 45 inch floorboards.


4.) Cut and attach Gorm planks to sides of one floor board using 8 metal l-brackets and wood screws.


5.) Spray paint primer and color for bottom board and top board (with stencils)


6.) Attach velcro to bottom board.

7.) Rock out!

~ Ray Mendoza, California, US

Gorm chairs


Materials: Gorm shelves, chair frames, circular saw and other assorted tools, screws

Description: I am lucky to live in a university town that sells surplus equipment to the public. I've gotten most of my chairs there...some really nice ones, too. These chairs started out very nice, but were used as outdoor chairs for many years until the plywood insides fell apart. So, I removed the cushions until I was left with just the metal frames, and replaced them with Gorm shelves (an older style than those now available here), which are just the right size to fit the frames. They still need to be waterproofed so I can leave them outside, but since I'm chronically lazy, that might not happen.

~ Dave Etler, Iowa City, IA

Gorm Propagation Station


Materials: GORM shelving, shop lights, heat mats, hooks, duct tape, power squid

Description: This is our propagator for starting seedlings in the basement.

We chose GORM shelves that make a total width of just over 4', since standard shop lights are 4' wide. After assembling the shelves, we added some screw in cup hooks to hang the shop lights from. The lights can be raised as the plants grow.


We put heat mats on one of the shelves since some plants like to be warm. The power for heat mats and lights is fed through a power squid which is taped under the middle shelf to keep it under control. We also put some plastic sheeting on the shelves to reduce the chance of water leaking through.

~ Edward and Cheryl, Boston, Massachusetts, USA

Check out this stream