erika tipped me on this fabulous hack. i'm liking it a lot - this homemade solar-powered cookie jar by cre8tor, as featured in instructables. it's so whimsical and reminds me of my firefly catching days.
making it seems simple enough. take an ikea glass jar (one from the ikea slom series would do great) and place the parts of a solar garden light into the jar. use blu-tack to adjust and keep the parts in place.
to frost the jar, use a strip of tracing paper or a glass frosting spray. close the lid and you're done. keep the jar by the window with strong sunlight and the light sensing diode at the top of the jar will charge the batteries. when the light goes down, your sun jar lights up. makes a great gift too. link.
salvaging an ikea lack coffee table
well, we know that ikea furniture is not made to last forever but before you trash it, get a little crafty and you may just give it a new lease of life.
chris salvaged his ikea lack coffee table - gave it new legs and a new look. first, he dismantled the table and his wife did a pretty decoupage for the top. then he cut pipe legs and mounted them to the bottom of the table to form the pipe base.
the end result is a totally new table, which looks anything but ikea. seems wobble-proof too.
just a thought - how about putting in the original lower shelf (after decoupage too) for additional storage? and perhaps finding a way to paint or wrap the pipes to match the table? the steel feels a tad cold to me.
step by step instructions here.
Labels:
furniture,
living room
another way to view pics in craigslist
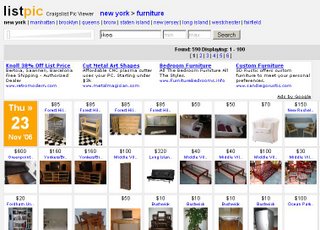
this probably belongs to a craigslist hack site but i found this amazingly useful. if you've ever used craigslist, you would have wished that you didn't have to click each entry to view the pictures. now, you don't have to thanks to ryan who created listpic.
just enter your keywords and listpic will search craigslist for entries with pictures. 100 thumbnails on one page, whoopee! browsing becomes a breeze.
give it a whirl. click here to see ikea furniture on sale in the new york area. or enter the city of your choice to see a fresh list.
just enter your keywords and listpic will search craigslist for entries with pictures. 100 thumbnails on one page, whoopee! browsing becomes a breeze.
give it a whirl. click here to see ikea furniture on sale in the new york area. or enter the city of your choice to see a fresh list.
Labels:
news
an international analog clock
sylvia tipped me on a new ikea hack group on instructables and her favourite entry, which is also mine - this super cool international clock by fungus amungus. sadly, nothing much of the ikea rusch clock remains in this hack, except the mechanism.
"this is an international analog clock so you can see what time it is in other cities. with a lazy susan bearing, some magnets, and a couple of bolts this baby rotates and then locks in place, thus changing the time along with the city name on top."
click here for step-by-step pictorial instructions on how to make one.
Labels:
accessories,
wall decor
picture them in light
this one's from steve and i must say that i do like them quite a bit. perhaps they are a reminder of my sis' art school days and me helping her pick out slides or cut transparencies on the backlit contraptions. anyhow, it's old school with new style.
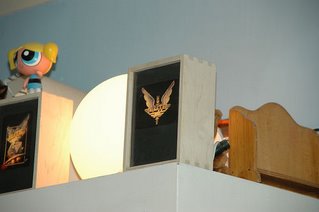
steve made them out of "ikea bas display boxes with a modified ikea light fitting and a small energy efficient bulb. the light fitting throws light up the white back to the frame and glossy white photo paper lining the sides, and gets diffused by a piece of animator's paper just behind the transparency."
what i like best is that even during the day, the pictures show through. nice.
Labels:
accessories,
Lighting,
wall decor
riddim's cocktail shaker light
another lamp from the prolific hacker riddim. an ikea coctail shaker + 25W bulb makes one moody lantern.
riddim's other lamp hacks:
> it's grate lightning
> a basketful of light
riddim's other lamp hacks:
> it's grate lightning
> a basketful of light
Labels:
Lighting
need help taking ikea furniture apart
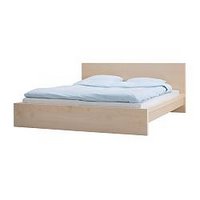
"we finished furnishing our one-bed apartment with exclusively ikea furniture and just when i thought everything was perfect, we found out that we have to move out of state! i want to take everything with me, but there is no way to get the ikea bed (malm) out of our bedroom unless we take it apart. is there some place where we can get instructions on dis-assembling IKEA furniture?
we also have the following:
1. lillberg sofa
2. a futon no longer shown on the ikea site
3. magiker sideboard
but the bed is the one i really need to take apart if I hope to vacate my apartment. please help! thanks." - tweety
(tweety also wrote to ikea's customer service and the 'official' reply is that they "are unable to give advice on how to dismantle ikea products as they are not made to be taken apart once assembled.")
tweety,
not sure if i'm much of a help either. i guess i'll just back-track how i put it together. anyone?
Labels:
bedroom,
hacker help
wrap your side table in lovely o'keeffe
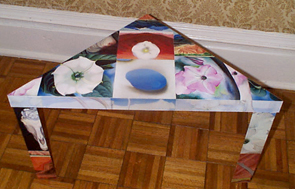
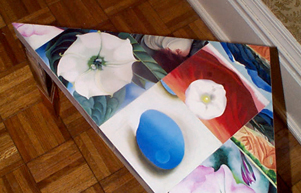
a pimped lack table by emily, which she also posted on craftster. she says it's not decoupage but can you tell the difference? it looks just as good to me.
"i made this table years ago but i'm still proud of it. it's made from pictures of Georgia O'Keeffe paintings from an art book i bought at a thrift store and a small ikea lack table my neighbor was throwing away! the pages were nice and thick so i could line up the edges of all the pictures very easily. after i glued all the pictures down nice and flat i covered it with many, many layers of varnish (top and legs separately), which yellowed the lighter parts of the pictures, but that's okay because they're bones and flowers!"
lovely. link.
other lack hacks:
> lack media storage with sliding doors
> lack table music console
> a mosaic lack side table
Labels:
living room
alison's starry decoupage dining table
alison's starry hand-me-down ikea table (which we both can no longer find on the ikea site, nor remember its name) caught my eye because i thought it was such an interesting hack. she used decoupage, a craft technique that involves glueing pictures onto an object and covering it with a few layers of glue or decoupage medium.
she makes it sounds so simple. take the table apart and sand down. cover with gesso and then paint. glue paper shapes to the painted surfaces with mod podge and lastly, layer on the polyurethane.
nice work, alison.
the best thing about this craft technique is that you can use any shape, design or even art to make your own one-of-a-kind furniture. alison drafted very helpful and detailed instructions on how to decoupage. click here to view them and more pictures of the table.
can i make a multi-fold room divider out of wardrobe doors?
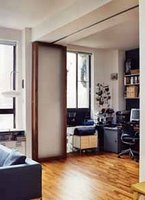
"not unlike vince's room divider hack, i want to use these pax drammen doors, 6 of them ought to do it, to create a room divider.
but here's the rub, i want them to fold up against a wall when they are not in use (most of the time). they will only be brought out to divide the living room in half when we have guests. the 'guest room' will then house the windows though, so i like the idea of it letting light through.
so i want to do something similar to this:
note how, when you need to, you can fold them against the wall, flat?
where there are a number of doors, they are center mounted and sliding. raydoor's solution for the lowest end is $5800, for 10' x 10' worth of door (4 10'x2'6"), and they need 75 days of lead time. also, if one breaks, it's another custom order.
the problem is threefold:
michael,
the 3 feet gap between ceiling and door is definitely a problem in what you're planning to do. a way could be to attach the top and bottom of the doors to a rod of some kind (curtain rods perhaps) and connect both ends of the rod to the track but that could be tough to do in reality. and perhaps quite ghastly looking. an option is to do a folding screen instead (here's a link for multi-folding door hardware but not sure if they are any good. i think the best bet is still your local hardware store.)
if you're still keen on sliding, vince explains in the comment sections here how he hung the doors using stolmen poles. drilling holes into the pax wardrobe required. you can hang the doors a foot off the floor to balance out the 10' ceiling height.
not sure how your living room is, but if you do have wall space next to the proposed door space, you can push the sliding doors all the way in (something like a pocket door, without the pocket), flushed with the wall, rather than fold them like your original idea.
other softer options would be to use ikea curtains like this or curtain panels on pulleys, so you can draw them away when not in use.
anyone?
but here's the rub, i want them to fold up against a wall when they are not in use (most of the time). they will only be brought out to divide the living room in half when we have guests. the 'guest room' will then house the windows though, so i like the idea of it letting light through.
so i want to do something similar to this:
note how, when you need to, you can fold them against the wall, flat?
where there are a number of doors, they are center mounted and sliding. raydoor's solution for the lowest end is $5800, for 10' x 10' worth of door (4 10'x2'6"), and they need 75 days of lead time. also, if one breaks, it's another custom order.
the problem is threefold:
- how do i find hardware that is reliable and sturdy (sliding stuff always breaks, even more so if you add rotation around a single point).
- how do i mount it to the pax doors?
- the doors are only about 7' tall, so how do i hang it in a 10' space and still leave the ceiling looking nice and open, not dividing the room into two when it's not used?
- can i just get the pax stordal put the track on a hinge, and swing it across the apartment, then pull the doors across when i need it? is that too ghetto?
michael,
the 3 feet gap between ceiling and door is definitely a problem in what you're planning to do. a way could be to attach the top and bottom of the doors to a rod of some kind (curtain rods perhaps) and connect both ends of the rod to the track but that could be tough to do in reality. and perhaps quite ghastly looking. an option is to do a folding screen instead (here's a link for multi-folding door hardware but not sure if they are any good. i think the best bet is still your local hardware store.)
if you're still keen on sliding, vince explains in the comment sections here how he hung the doors using stolmen poles. drilling holes into the pax wardrobe required. you can hang the doors a foot off the floor to balance out the 10' ceiling height.
not sure how your living room is, but if you do have wall space next to the proposed door space, you can push the sliding doors all the way in (something like a pocket door, without the pocket), flushed with the wall, rather than fold them like your original idea.
other softer options would be to use ikea curtains like this or curtain panels on pulleys, so you can draw them away when not in use.
anyone?
Labels:
hacker help,
living room
curbly's happy contest
this has nothing to do with hacking but it's a fun contest. and you may win a $200 ikea gift card to fund your next hack.
bruno dropped me a mail about his new site, curbly.com, a community for diy people who love where they live. it's a place to share the creative stuff you've done on your house, get inspired by what others have accomplished, and get expert advice.
to celebrate their public launch, they are running a "happy contest". all you need to do is sign up and post a picture of the favorite place in your home. and be in the running for the dosh.
off hand, i can already think of a few of you regular hackers out there who should be sending in pictures of your homes. your homes rock! so, get clicking.
Labels:
news
barbex's smart tv recorder
when barbex of hamburg, germany, sent me this hack, i was totally overwhelmed by the nuts, bolts and wires. it is a hard hack, for me the tech-incompetent, but i do like the idea of building a multimedia hub inside a piece of living room furniture. you hide the ugly wires and still have a nice side table for your room. how cool is that?
inspired by the original idea from here, barbex took a year to build it, in between baby duties.
"for years i had planned to build a HTPC, a living room computer to record television onto a hard drive and serve as the multimedia hub for the whole house and family. after lots of drawings and concepts that never came to life i came across mp3-cube.de where they built a computer inside an ikea hol storage table as an mp3-jukebox. that was it! normal living room furniture to be used as a computer case for a living room computer, simply perfect!
my design is a regular computer with a small lcd-display and a tv attached as the second screen. i salvaged an old case for the mainboard tray, switches and hard drive cage, used all kinds of old hardware i had lying about and got the rest of the stuff i needed from ebay. and of course i bought a hol table from ikea and had a glass pane cut for the top. best system i ever built. and i love, love, love it!" link.
related hack:
> this hol hides a subwoofer
Labels:
living room,
media storage
it's grate lightning
another from prolific hacker riddim, who already gave us the ikea basket lamps. this one is made from an ikea grate and it only takes an hour of work. i like the funky reflections. i think it would be wonderful hung above a kitchen breakfast counter.
"it gets really hot when powered by a normal bulb. and as you turn it on and off by pressing on top it might be not possible to turn it off when it gets too hot. so i added an emergency switch on the cable," riddim says. he is also willing to hack it for you at $49 (EUR49 + S&H) and will ship worldwide. contact him here.
sew easy
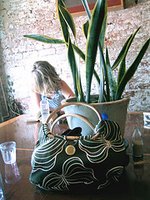
alina does a sister maria with her skirt made from ikea curtain fabric. while on maternity leave, she hemmed this up just in time to go back to work in. it's from McCalls pattern M4519 and the fabric used is inez blad. buttons are wooden, which give it a nice touch.
update!
i almost missed this out. alina also sent me a link to her matching inez blad handbag. it's gorgeous!
related hack:
> an ikea skirt from pillowcases
update!
i almost missed this out. alina also sent me a link to her matching inez blad handbag. it's gorgeous!
related hack:
> an ikea skirt from pillowcases
Labels:
fabrics,
miscellaneous
ikea gnome christmas gift tags
you know what, i bought these gnome christmas decorations last year but now that i've seen what clairol did with them, i ain't going to hang them on the tree this year.
clairol writes, "i decided that they'd look much better on gift tags, than as decorations. so i made them into christmas gnome tags with some brown tags, my stamping kit and my trusty glue gun."
cute. and it finally feels like christmas is coming. link.
also, check out ikea's holiday offerings.
clairol writes, "i decided that they'd look much better on gift tags, than as decorations. so i made them into christmas gnome tags with some brown tags, my stamping kit and my trusty glue gun."
cute. and it finally feels like christmas is coming. link.
also, check out ikea's holiday offerings.
Labels:
craft,
holiday,
miscellaneous
french tv wants you
was just checking in on jen's and saw this entry which was too juicy to pass up.
a reporter from french tv is looking for ikeafreaks fans. she's doing a story on the big blue and yellow and is looking for anyone who has a home chock-a-block with flatpacked goodies. they'll shoot your home and all the fun stuff. and you'll get to bask in the limelight for a bit. hop over to jen's ohikea for contact details.
a reporter from french tv is looking for ikea
Labels:
news
a zebra desk
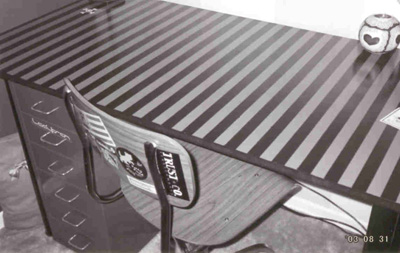
the last one on zieak's list from craftster - a stripey desk. dollparts made this desk a while ago from 3/4" mdf, propped up by what i suspect are ikea vika curry legs and a helmer drawer unit. latex paint and lots of varathane later, out comes this beauty.
though it's a little dizzying, i love it. link.
check out her handbags too. [dang, they are all sold out!]
though it's a little dizzying, i love it. link.
check out her handbags too. [dang, they are all sold out!]
Labels:
furniture,
work station
mini chests with ribbon weave
hustlerose posted this ikea fira mini chests with a unique ribbon weave on craftster. not my style but i like it that it takes a completely different route from other fira hacks i've seen so far. what a creative twist.
"so like a couple years ago i bought the standard wooden boxes from ikea ... and thought it would be more fun to weave ribbons on the front and here is the result:"
"basically, i glued strips of the colored ribbon on one edge of the box and the white ribbon along the bottom of the box. the colored ribbon was wider so i put the strips right next to each other but the white ribbon was thinner so i spaced them out. then i wove them together and glued them down on the other sides of the box (all the colored ones first, then the white ones and then i went back and re-glued any of the ribbons that came loose or needed to be adjusted). then i glued the black ribbon all the way around, cut of any ribbon that went past the black ribbon and glued black ribbon to the front of it because i didn't really like how the plain wood was showing on the front." link. [thanks, zieak!]
related hacks:
> a touch of class for ikea mini chests
> ikea fira mini chests get hot new looks
> barbie box
Labels:
accessories,
craft,
storage
barbie box
i'm one of those little girls who never had a barbie in her life. not that i wanted one anyways. back then, i hated everything pink and frilly. i'd rather play with tanks, soldiers, cars and my favourite japanese superhero, ultraman, with his deadly specium ray ... but i digress.
back to barbie, this is for you barbie lovers.
"i bought one of those storage boxes from ikea and decided to decorate it and as my room has no specific style i thought when in doubt use barbie," gemjams posted on craftster, "all i did was paint it all, then i got the pictures i wanted (they came from a barbie book), stuck them down then covered it with varnish, you can use pva glue however it is harder to clean as it goes all sticky. for the front picture i took out the drawers then i just placed the picture on top and cut where the drawers ended. simple as that." link.
related hacks:
> a touch of class for ikea mini chests
> ikea fira mini chests get hot new looks
Labels:
accessories,
craft,
storage
make mine a mosaic table
you'll love this one. when i first saw this i almost squealed in delight. such a lovely idea and executed with such painstaking love too. thanks to zieak, who tipped me on this mosaic table by keyoung posted on craftster.
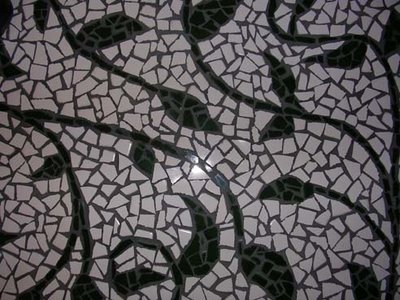
"i just finished mosaicing a cheap ikea end-table (a lack table, i think). i settled on an ikea table after searching thrift shops for months and not finding a suitable table. it's really nice to have non-beveled edges so you can easily mosaic over them. it was a lot of fun, not terribly hard but time consuming, and i already have ideas for at least 4 more tables!
i used homedepot bathroom tiles and a hammer and tile nipper to break them up. i secured the tiles using liquid nails (clear small projects) and finished up with grey non-sanded grout. i'm pretty proud of it, hopefully it'll inspire somebody out there to give mosaicing a shot!"
close up of mosaic
link.
Labels:
furniture,
living room
how to add your own images to the skugga lamp
as promised, another lamp hack from zieak's list.
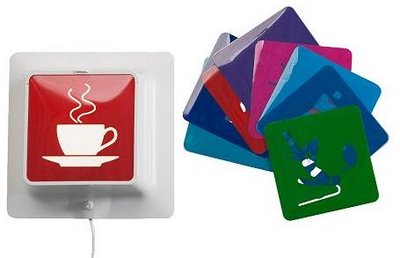
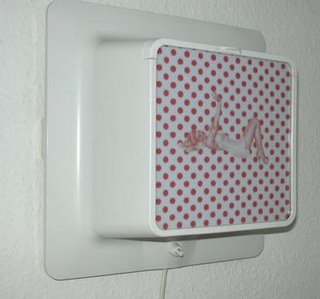
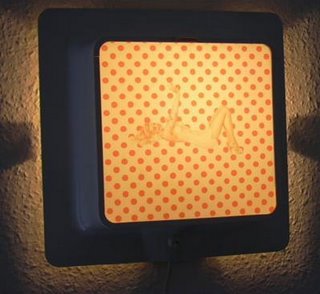
the idea of having changeable images for a lamp has always fascinated me and there has been more than one occasion that i've stared longingly at the ikea skugga lamp. this skugga hack by friederike definitely takes it a notch up and opens up loads of possibilities.
it's also pretty easy to do. just put together the picture you want using software such as photoshop. size it according to the insert that comes along with the skugga and then print it out on an overhead transparency. cut it to size and slot it in as you would the usual skugga inserts.
link.
related hacks:
> drinks umbrella lamp shade
> fabulous nudie postage stamp lamp
the idea of having changeable images for a lamp has always fascinated me and there has been more than one occasion that i've stared longingly at the ikea skugga lamp. this skugga hack by friederike definitely takes it a notch up and opens up loads of possibilities.
the original skugga and inserts that look more like toilet signs
it's also pretty easy to do. just put together the picture you want using software such as photoshop. size it according to the insert that comes along with the skugga and then print it out on an overhead transparency. cut it to size and slot it in as you would the usual skugga inserts.
make a statement with your skugga lamp
link.
related hacks:
> drinks umbrella lamp shade
> fabulous nudie postage stamp lamp
Labels:
Kitchen,
Lighting,
wall decor
little umbrellas, big light
another lamp hack from zieak's craftster list. this one's from lil jammer and it makes you wanna order a mai tai.
there are 2 ways to skin this lamp.
related hacks:
> nudie postage stamp lamp
there are 2 ways to skin this lamp.
- lil jammer trimmed about half the stick off the umbrellas, poked them into the ikea paper lantern (i'm guessing it's the ikea regolit) and rolled the sticks in scotch tape from the inside to stop them from falling out.
- a craftster reader suggested applying glue on the underside of the umbrellas, sticking them through and cutting away the stems from inside. use low-heat glue as white glue won't cut it for thin paper and hot glue just burns through.
related hacks:
> nudie postage stamp lamp
Subscribe to:
Posts (Atom)
Check out this stream
Blog Archive
-
▼
2006
(137)
-
▼
November
(22)
- light up with a homemade sun jar
- salvaging an ikea lack coffee table
- another way to view pics in craigslist
- an international analog clock
- picture them in light
- riddim's cocktail shaker light
- need help taking ikea furniture apart
- wrap your side table in lovely o'keeffe
- alison's starry decoupage dining table
- can i make a multi-fold room divider out of wardro...
- curbly's happy contest
- barbex's smart tv recorder
- it's grate lightning
- sew easy
- ikea gnome christmas gift tags
- french tv wants you
- a zebra desk
- mini chests with ribbon weave
- barbie box
- make mine a mosaic table
- how to add your own images to the skugga lamp
- little umbrellas, big light
-
▼
November
(22)