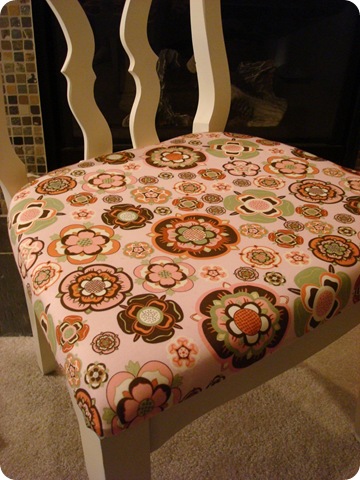
I thought it was high time I showed you the after of the chair I redid for the IndyStyle show last month! It was quite the transformation – from totally-disgusting-I-can’t-believe-I’m-touching-this to ooh la la, I would totally sit my behind on that!
I didn’t take pictures of the whole process but luckily I’ve shown you how to do this before, so I stole pics from this old post. ;)
Let’s start with the obligatory before picture:

Here’s a closer picture of the seat:
Awww yeah…blown up big for you to appreciate the high level of grody.
The chair was laminate, so I lightly sanded it to start. And when I say lightly, I mean – quick like a rabbit because I HATE sanding. Then I wiped it down, and used a spray primer to get in all the nooks.
I let it cure for a day, then used my Heirloom White spray paint to finish it off – just one coat was all I needed with the primer as the base!
Because the foam on the old chair was pretty much non-existent, I cut out some new foam by just taking the seat off (unscrew from the bottom) then, laying it on foam and tracing it out like I showed you last year:

I sprayed the foam and the wood seat with spray adhesive, then just placed the foam on top of the wood. Usually I use batting next, and staple it underneath the seat to secure it:

Then you do the same process with your fabric – stapling around the bottom. (Again, this pic is from an old post):

Not this:

I picked out a really fun, funky fabric for the seat – you need very little to cover a chair! It now sits in our master closet:

The new light color shows off the pretty lines of the chair:

So here’s this month’s before and after for your viewing pleasure:
My $6 chair – $4 for the chair, $2 for the fabric. (I had the foam, spray paint and muslin.):
You like? I can’t wait to see what you’ve got to share! Link it up folks!! Make sure directly to your post, not your blog address. (Right click on the title of your post, and copy the shortcut into the linky.)
It will be open till next Monday, so feel free to link up until then! Have fun!


